The game begins with the fact that Javier is ours main character new season, rushing to its home where his father dies. On the porch we see his brother, David. From him we learn that his father is already dead. Select an answer option. This must be done within the allotted time, which is displayed by the bar below. David beats his brother out of anger and tells him how his father was waiting for him to appear. David's son Gabe notices all this action.
After this, David tries to justify his anger at his brother, and a heart-to-heart conversation begins. During the conversation, choose response options. Javi finally goes inside the house and goes to his mother. She's also mad at Javi. The girl brings a glass of water to her grandfather, in response to the adults’ question, saying that he woke up. Entering the room, the family finds the grandfather at the window, standing with his back to them. Suddenly, the “grandfather who has risen from the grave” attacks one of them. The dead man manages to bite his mother before Javi decides to knock out his father. The family is divided into two groups. David decides to take his mom to the hospital and later meet Javi and the others there. They get into the van and leave the house.
A little later we find the heroes on the road. They are running from a herd of walkers. Javi and Kate - David's wife - get into the car and continue driving. Kate decides to smoke a little. You can join or refuse. In the car, through a conversation between Kate and Javi, it is brought to our attention that she is the stepmother of these children. It's difficult for her, but she copes. Children wake up and smell the smell of smoke. They clearly don't like this. The group decides to stop to replenish supplies.

Javi leaves the car and looks around as Kate drives it into the junkyard area. Javi turns his attention to Marianna, who is praying. Kate puts everything into perspective and the first thing she says is that we need to look for gasoline. The conversation is interrupted by a walker wandering nearby. We press the corresponding key to get the crowbar and finish off the dead man with two blows by pressing the other one. Then we talk with Marianna. She admits that she wears headphones to fool us; the batteries on the player are dead.
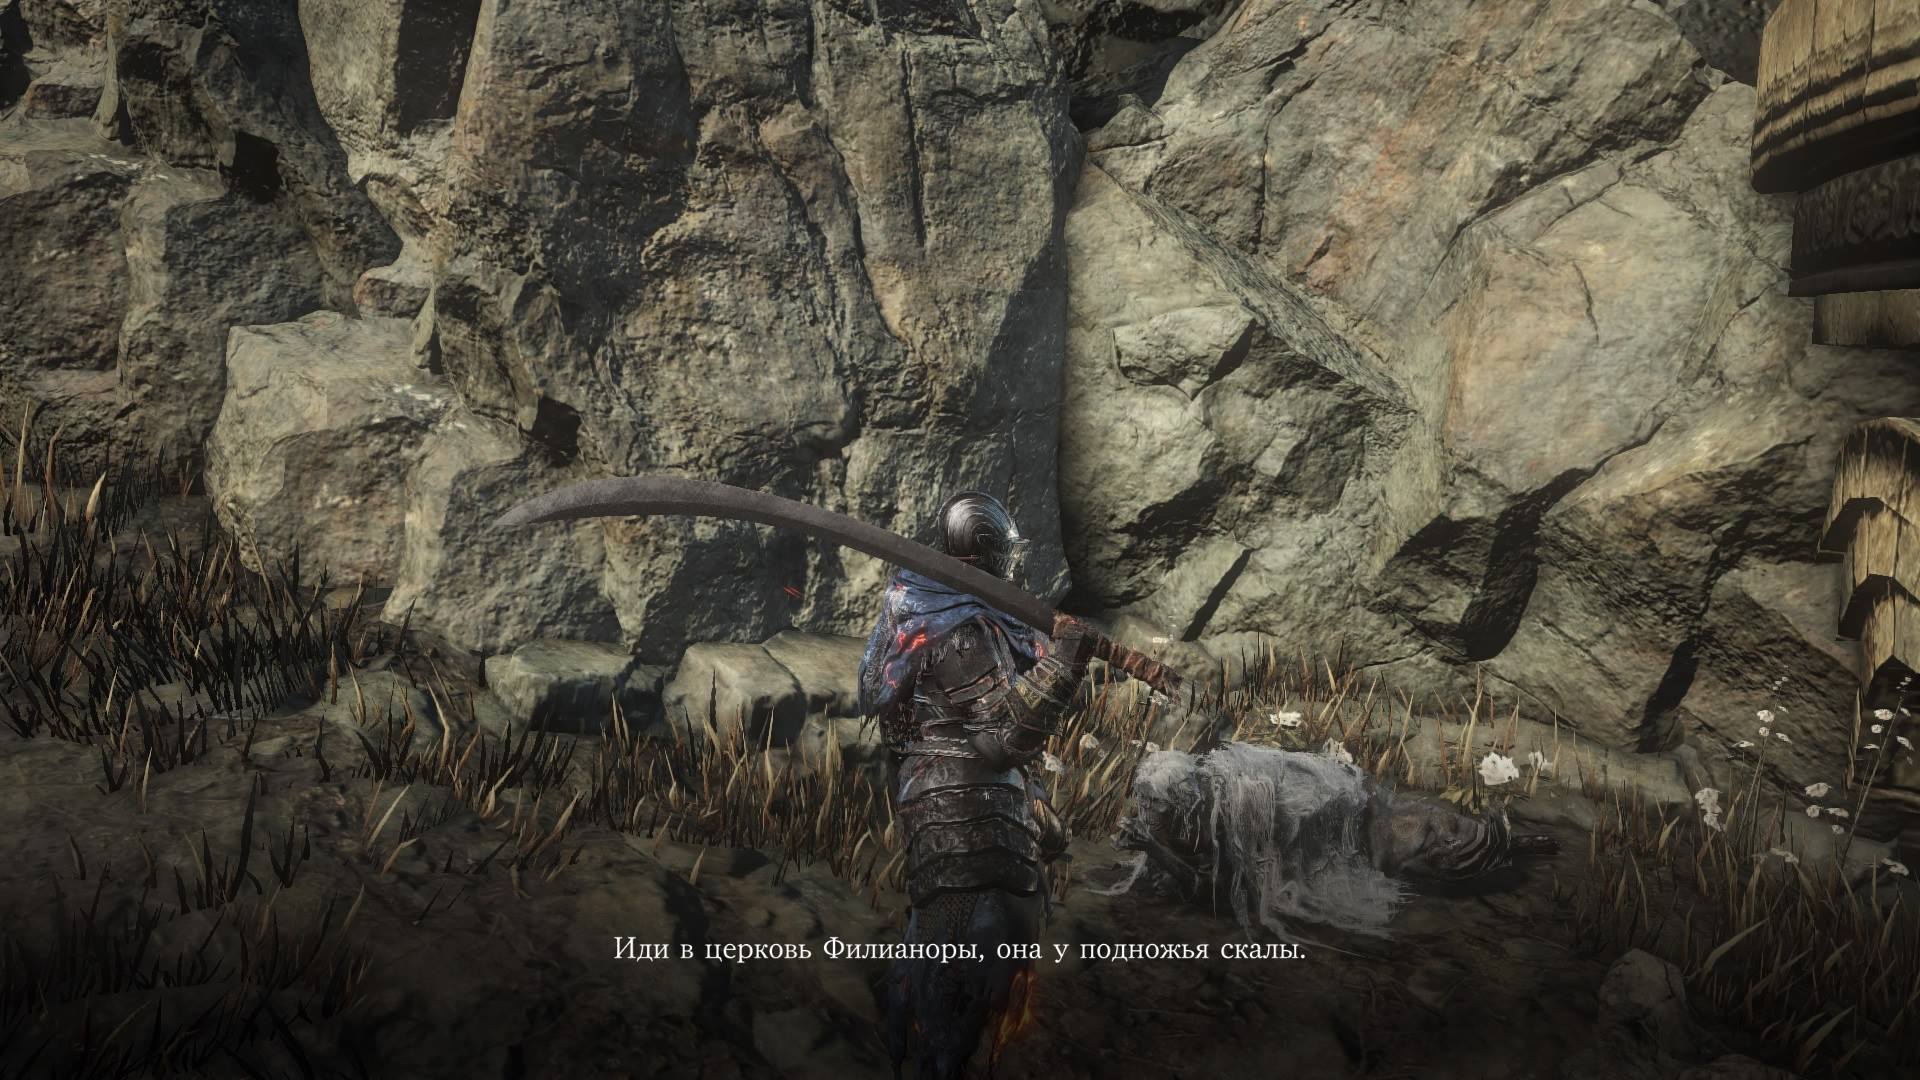
Now we manage to “steer” for the first time this season. We examine the landfill. You can talk to all the heroes, but our goal is to find fuel. In the depths of the landfill we find a car. We approach and press the action key to start draining gasoline. A walker suddenly crawls out from under her. We kill him with one well-aimed blow. Then we continue to drain the fuel by pressing the button. We go around the containers and find another car, repeat the previously described steps. The last truck left in this location is a little further from the container on which Gabe is sitting. We go to the very end and come across a staircase. It's probably worth seeing what's there. Javi decides to go up and takes Gabe with him. On the other side they find a whole truck of honey. help. The gas tank is locked, but it doesn’t matter, we have a crowbar, in one motion we tear off the cap and begin to drain the gasoline. There's a lot of fuel there, so it's worth looking around further. We blow off the head of the next zombie and move forward. Behind the containers there is some kind of housing. We go up the stairs to the door and try to open it. Locked. Hmm, there's something interesting inside. There is a hatch on the floor. Maybe we can get through somehow from below. Near the veranda we move the board aside and climb into the hole. Using the movement keys, we crawl to the hatch, and with the next button we open it.

We examine the home from the inside. You can find batteries in the desk drawer. Later they can be given to Marianne for her player or saved for another occasion. We approach the shelves at the end of the room and find supplies. There is everything you need here: mattresses, blankets, food... We decide what to do, stay or move on. One way or another, this “choice” will not particularly affect anything, only Kate’s attitude towards us, which we will support or not accordingly. After talking with her, we go to pick up a canister of gasoline. But there’s an ambush, we’re surrounded by thugs with weapons, it turns out we’re stealing from them. Javi is led inside at gunpoint. They let us inside first. We pull the handle and open the door. The group managed to hide below, under the hatch. After examining the room, one of the guys decides to go get handcuffs and leaves the black guy to look after Javi. We try to negotiate with him, but it’s all in vain, since the group gave themselves away by coughing. Whatever we choose, everything will come to the point that we will be captured.

Some time later, Javi is already tied up in a car with some guy. Javi tries to negotiate, but the trip is interrupted by a tree falling on the road. The truck flies into a ditch. Lee, taking the gun, leaves the car. Soon our carrier does the same. We decide to kill him or let him go. I chose the second option. Our freedom did not last long; within a second, Javi was at gunpoint. Oh my god, it's Clementine! She set up this whole ambush with the truck. She needed transport. Javi tells the whole situation and decides to help him return to the place from which he was taken. But in return he demands his van. Along the way, the heroes get to know each other. There is a zombie on the road, which Clem deals with first-class, thereby surprising Javier. The path is blocked by a large herd, Clementine suggests waiting in a nearby town.


Moving towards the gate you will have to warm up a little. We dodge to the left from the walker. The gates are closing. To get inside you will have to kill all the zombies on the street. We aim and shoot them in the head. Clem's weapon fails and she is attacked by a walker. We shoot him in the head. Now it's time to quickly get inside. We are allowed to stay here for a while if we keep a low profile.
Javi and Clem go to a local bar. She needs to talk to one person about the cartridges. She leaves us for a while. We approach the bar and try to talk to the locals. The bartender recognizes Javi, he was disqualified for life for cheating with bets. He introduces himself as Conrad, and the woman at the table is called Francine. She will decide to consult when playing poker what she should do. We choose the option with equalization. He's clearly bluffing. Suddenly the situation with Clem and the conversation generally turns unfriendly. The bald man sold her cartridges that didn't fire. Clementine proves this by shooting him, but the dealer attacks her with a knife. We often press the action button to confront the attacker, then another button to pacify.

Clem accidentally pulls the trigger and hits him right in the head. Headshot! Clem tells the other bar patrons that he attacked them and she was forced to defend herself. We can confirm this or not. In my case, everything turned out as she said. The boss decides to lock up the couple and then decide what to do with them.
In the cage, Clem thanks him for the cover. Soon a pretty doctor comes to look at the knife cut on Javi's face. Eleanor, that’s her name, having learned that Javi’s people were attacked, decides to somehow help him. Tripp, the boss in this “town,” says he will leave us in a cage for the night. But Eleanor suggests escaping through the back gate at night. It's time to decide. We set out at night with the good doctor, but for now it’s better to lie down and take a nap.

Clementine remembers the old days: she is looking for food with a little boy behind her. The girl decides to leave him in the car for a while so she can hunt in peace. The baby's cry attracts walkers. Having gone far, Clem discovers that zombies are already hanging out around the car. We shoot in the head the one that is rubbing around the car, then the second one. After Clem is trapped with his hand clamped, we take the stone and beat the walker trying to attack us. Open the door and free your hand.
Time has passed and our heroes are on their way. Soon they arrive at the place. On the ground we find a walker and a couple of objects. We take a hammer and immediately knock down the zombies with it, select the tape recorder. Marianne must be somewhere nearby. The girl was found, all that remained was to find Kate and Marianne's brother. A small crowd of walkers surrounded the tractor in which Kate was hiding. We fight our way to the car, alternately pressing the buttons that pop up on the screen.

Having freed everyone, Javi introduces all the heroes, and they head to a settlement nearby, from which Javi and Clem recently escaped. On the way, Marianne finds her headphones, but suddenly events take a very bad turn, resulting in Marianne’s death. The bandits are back! Kate, who decided to help in some way, also ends up wounded. We fire back in response to enemy fire. With this we give the family a chance to move away. We decide that it’s time to stay and help Clem fight, because the bandits may return if we don’t get rid of them. We'll leave the family to Eleanor. One of the bandits throws explosives. We aim at Clem and protect her from the explosion.
Episode 2: Unbreakable Ties (Part Two)
After what happened in the previous episode, we are transported back in time to the house of Javi’s brother, David. Javier tries to help Kate with the dishes and they talk about what they will do next. Then Kate suddenly accidentally breaks David's army glass. He comes to the noise. In a conversation, you can provoke a quarrel, or you can cool the ardor and resist the temptation to yell at David, which, in fact, is what we do.

This is where the flashback ends and we are back with Clem near the landfill. The armed thugs have left, but Marianne cannot be returned. Clementine took care of a grave for her and dug a hole. Javi places the body in the hole and prepares to bury the hole. You can give her a cassette recorder or keep it for yourself and continue burying the grave. The sound of the dead can be heard nearby. We kill the last one remaining. Javier notices a mark on his neck. Clementine knows something about this. She's met guys like this before. According to her, they are called "New Frontier". Clem was in their camp, she was a prisoner, but managed to get out.
Clem found the car and is still thinking about leaving on her own way. In the meantime, they decide to return back to Prescott, where the rest of the group was taken.
At the camp, Javi finds Eleanor caring for the wounded Kate. Her condition has stabilized, but if the bullet had hit a little lower, we could have lost her. Eleanor says that Gabe really wanted to help and stayed, but then he couldn’t stand it. It's worth finding him and talking to him.
You can talk to Tripp in the courtyard. He is a kind man and invited us to live in Prescott. True, he was a little upset that we left without telling him anything last night. Under the wing of the plane, if you go a little further, you can find reserves of water; it’s worth taking some with you. At the gate we are told that Gabe has walked towards the front gate. An evil guy desperately chops into pieces an already killed walker. He wants to return and bury Marianne. Javi says he did it. The boy is also worried that he did not help Kate during the operation and ran away like a cowardly boy. We convince him that this is not so and say that he is not to blame. The conversation is interrupted by the sound of an approaching car...damn, we have guests. Javi and Gabe run to the gate. The group decides to take up defensive positions on the wall.

Old friends came to see them. They have the New Frontier mark on their necks. The bandits want to take Javi and put him on trial for killing their people. But the fact is that he was only defending himself! To add some incentive, they brought Francine out. After a couple of seconds, the woman loses a finger. We decide to open fire, since the words of these thugs cannot be trusted. The massacre begins. As a result, Francine is killed. We aim and kill one of the thugs. There is open fire on the wall, we bend downward to avoid getting hit by a bullet. While the enemy is reloading, we get out from behind cover and shoot in the head. One of the enemies got through the first line of the gate and decided to sabotage the fortification. We shoot at him, but the explosive falls from his hands and demolishes the gate. The guys get in the truck and decide to destroy the gates to Prescott. A great idea that ended in a crash and the release of several walkers they brought with them. Javi is attacked by one of them. We throw away the dead man and finish him off with a knife. Tear gas grenades are flying from behind the gate. Javi decides to find Kate and Gabe. We make our way through the clouds of smoke and kill everyone on our way. A car suddenly appears from the gate, we jump to the side and aim towards the door from which the driver will appear. We make a well-aimed shot. The group gets into the car and leaves the area. Tripp tells them to head east, he will follow them.
Having reached safe territory, they decide to stop and discuss everything. Conrad lost his wife. The group is trying to somehow cheer him up, but they only add fuel to the fire, which causes a conflict to brew. He blames Javi for everything; if he hadn't walked into Prescott's gate, everything would have been fine. Gabe intervenes in all this and points the gun at Conrad. We tell Gabe to lower his weapon, to which he obediently agrees. Clem suggests going to Richmond, where there are people. There will probably be food there and it will be safe. Javi supports Clem and Conrad eventually agrees to continue on his way.

In the car, Javi keeps an eye on Kate. She is thirsty. It's good that we took a bottle of water with us. We give it to Kate. Eleanor sees a bad sign in the fact that she is thirsty. The sooner the group gets to Richmond, the better.
Halfway through the journey there is a forced stop. The tunnel is littered with old cars and there is no way to get through it. A couple of walkers appear behind them, but Clem and Conrad quickly deal with them. The cars will have to be pushed aside to clear the way for passage. You can't do this manually, even with Tripp's help.

Near the truck you can find a garage door. Let's open it. Let's be careful, there is a walker behind her who will immediately attack us. Having broken his skull, we take the key in the corner and interact with the winch. We use a wrench on the winch latch so that it can be pulled out and pull the cable to the car. On the left is a battery that needs to be powered to tow the car. Near the gas station in the trunk of a red car we find wires for lighting. We connect them and start the mechanism. Walkers appear from behind the car, where would we be without them? They immediately attack the car in which Eleanor and the wounded Kate are in. We set out to save them, dealing with the undead. With the path cleared, Javi tells them to clear out and continue on to Richmond.


The truck they arrived in is no longer within reach. Javier decides to climb onto the roof. We move the container to block the path of those walking behind us, Gabe comes to our aid with this. Meanwhile, while he is climbing up the stairs, we shoot at the walkers. Suddenly, Javi is attacked from behind by one of the undead. He shoots him in the head right next to his ear, stunning himself. We climb onto the container and, with the help of Conrad, onto the roof. By that time, crowds of walkers had taken over the entire area. On the roof, Javi notices a silhouette of a person. He sneaks in and finds the scarecrow. A moment later, Javi feels the barrel of a gun on the back of his head. Soon the rest of the group comes to the rescue and ours is at gunpoint. new friend. They suspect that their new acquaintance is from the New Frontier. We can’t trust anyone, so we check the mark on his neck. The guy didn’t lie, he’s not with them. It also turns out that Richmond, where the entire group was heading, captured the New Frontier. This is not very good news, since Eleanor and Kate were heading there. The stranger offers a shortcut to Richmond through a train tunnel. He himself introduces himself as Paul, to his friends he is simply Jesus.
We are transported back in time and shown another scene with Clem and the baby. They escape from a herd of walkers and find temporary shelter in a trailer. We break down the door with two blows and get inside. We move the closet to the door so that no one gets inside. The baby is very scared and starts crying, we try to sing him a song so that he calms down a little. Suddenly someone knocks on the door, it’s a man. Soon a girl burst inside. We help her hold the door. Subsequently, Clem learns for the first time from Ava, that’s her name, about the group “New Frontier”.


In the present, the group, together with a new member - Jesus, moves through the tunnel. Clem decides to talk more about what connected her with the New Frontier. She tells Javi that she was their prisoner and shows her mark, the same one that the bandits who attacked them had. Clem cannot show herself to them again, so she decides to leave the group once they are out of the tunnels. Having gone a little further, the group finds a whole bunch of walkers hiding in the tunnel. We kill a couple of zombies until Conrad gets the idea to shoot, SHOOT... IN THE TUNNEL... The group can only run away as quickly as possible and get to the surface. There's a train in the way, so they decide to walk through it. Someone has to stay and hold the door so the walkers don't follow. Javi, along with Clem and Gabe, decided to stay. We find a piece of pipe that can support the door. The job is done, it's time to get out... but it doesn't quite work out. Conrad stands in the way. It was clear from him that he suspected something. He heard the entire conversation and asks Clem to repeat her words. She shows the mark. The restless Conrad wants to turn her over to the guys from Richmond to make a profit. We tell Conrad to lower his weapon, after which we aim ours at him. Black takes the boy hostage. Well, it's time to stop this chaos. It was high time to get rid of him. We shoot at Conrad.
Clementine leaves us here. And it’s time for us to show ourselves to the others, too. At the exit from the canals, everyone asks where Conrad is. It’s worth lying and saying that he was caught walking, that he is no longer with us. You shouldn’t tell the truth about Clem either, “she just left” - such an answer will be more profitable.

The streets of the city are empty, it is so quiet here, quite strange for the place where the New Frontier lives. The group, or rather what is left of it, finds the car in which the girls left. Inside, Javi finds Kate. She seems to be fine. But where is Eleanor? Kate says she went to get help and never returned. It's time to knock on their door and ask for help. Approaching the gate, we see the already familiar bandits from the New Frontier. Javi offers to put aside all differences for later and help the girl. He puts pressure on the bandits and tries to evoke compassion from them. In the end, it all ends with the bandits agreeing to let the group in, provided that they lower their weapons. We give the order to remove the weapon. We do everything as they say...for Kate's sake. The gate opens and... David himself appears there.
Episode 3: Outlaw

Javi and Kate went outside at night in search of propane. Dangerous time days, the dead can appear out of nowhere. They notice the truck and find what they were looking for in it. We take the gas cylinder and...unexpectedly, it turns out to be empty. Kate angrily throws him away. Oh, can you be quieter? Just now she was afraid of every rustle, and now she decided to lure all the walkers from the area, well done, friend.
While the heroes sat down to rest, a walker attacks Javi from behind, press the appropriate keys to escape. The zombie turns out to be a child, damn it...and again Kate fails. Now at least it’s excusable, she can be understood, she lost her daughter and did not dare to raise her hand against a zombie child. Javi handles it. Kate recognized Gabe's friend Drew in the boy. Javi explains to her that these are no longer people, only their appearance remains.
Returning to the house, Kate says that we need to get out of here and move on, where it’s safer. Perhaps she's right. David disappeared for three months and never returned. We need to somehow persuade the children. They overhear the conversation and don't want to leave. We explain to them that every day it becomes more dangerous here. Gabe insists and does not want to leave the house, saying that if he needs help, he will ask his friends. He should probably tell the truth about what Javi and Kate saw on the street. Gabe agrees to leave and wants to leave a note for his father if he does return. Final preparations and the family leaves the house.

Now we return to where episode 2 left off. All the heroes are kneeling in front of the New Frontier at the gates. Kate needs help. David takes her in his arms and leads her to the infirmary. The rest are taken to the cell where Eleanor ended up and was captured. She is worried about Kate's condition. Javi says they weren't even looking for her, but now she's in the hospital. Eleanor also learns that these people are the New Frontier, and the leader is Javier's brother. But that’s not all, Tripp says that Kate is David’s wife, so she didn’t end up in the cell with the others. Later, the guys begin to discuss David and figure out how involved he is in the attack on Prescott and whether he is involved at all, or whether the New Frontier does not bring him up to date. Tripp wants to restore justice and answer them for what happened on his land. Javi decides to talk to David alone before doing anything rash. Speaking of David, he's right there. He wants Javi to see Kate. The rest remain in place. It is worth saying that we will be back and will not leave them here.


The brothers are walking down the street, heading to the hospital. On the way, David says that Gabe told him some strange things. It looks like he suspected something about him and Kate, well, let's tell the truth. But...fortunately that's not what he's talking about. David is furious when he finds out they've lost Marianne. It’s worth telling him the truth about his daughter’s death. Javi says that those who shot Marianne wore a milestone mark and they also shot Kate. He doesn't seem to know what's going on here. As it turns out, he’s not the big guy here, and three more people rule Richmond. David is in charge of security. He found out about two of his guys who might be involved in this. Along the way, they meet Ava, the girl who first brought Clem to the New Frontier.
The brothers reached the place where they were caring for Kate. Gabe was already sitting in the room. Kate is happy to see Javi. Suddenly she feels unwell. Gabe and David run after the doctor. Yeah, it was all to talk to Javi alone. She says that she is scared to be here, she wants to get out of here, she says that these people are murderers. Javi agrees and gives her words that at the first opportunity they will leave this place. Soon the doctor arrives, Kate says that she is already better. Kind of weird. Playing along with her, Javi says that it might be the stitches that have torn. The Doctor is impressed with the work that has been done to help Kate. He wants to see Eleanor. Javi tries to get the whole team out, but it won't happen.


Now the brothers are heading to a meeting with the rest of the leaders of the New Frontier. Once there, David introduces Javi to everyone. The guys had prepared food and were just about to eat. We are offered a choice: cake, vegetables, or say that everything is delicious. This is true. They seemed to like Javi. They sit down at the table and begin a conversation. After some time, Max comes up with a couple of guys. Everyone already knows that Max and Javi were feuding. The first one was asked to tell how it all happened. Then, unable to restrain himself, Javi says that his people killed David’s niece and part-time daughter. We continue to tell the truth about what happened earlier. The main one decides to throw everyone out of the gate, David is unable to do anything.
So Javi, Tripp and Jesus were thrown out of the gate. Ava handed over the gun bag from David. Tripp starts to persist and Ava punches him in the face. Well, let's see what's in the bag. There the guys find a map and a bat. Let's look at the map. We find all the points on it, interacting with each one. On the map, David indicated the path to follow. Now we need to find the north in order to understand which direction to move. Javi looks at the sky, we find the brightest star. The bag contained mostly weapons, no food. Well, we'll have to do without it. Along the way, Tripp says he never thought he and Kate weren't together. They have a heart-to-heart conversation. Jesus, walking ahead, noticed something. Soon the walkers will appear. The meat grinder begins. Press the appropriate keys to finish off. Suddenly, a walker attacks from the side, a second one joins him, we need to do something, we quickly kill one, but the second one manages to knock down Javi, click [Q], then [E], Clem appears out of nowhere and helps with the final blow. Javi tells her that they were kicked out of Richmond and she finds out that David is Javi's brother.
We are transported back in time and Clem resorts to theft to save the baby. We make our way into the tent using the movement keys, the baby begins to cry, we calm him down with a song and see what medicine is needed. Vancomycin. We take the syringe at the top right on the shelf, then there is the medicine we need just below. We fill the syringe with medicine, and as always, things can’t go smoothly. One of the residents wakes up in the tent and dissuades Clem from injecting the medicine, saying that the injection will not help the boy and she will only waste the last dose. Clem decides to get the injection, she has to. David comes to the baby's cry. After a long conversation, he decides to kick Clem out. They decided to keep the baby for themselves. Clem was allowed to say goodbye, after which she left.

Let's return to the present. We hug upset Clem. And again the meat grinder. Press [Q] to close the fence. Well, it will hold out for a while, but we need to figure out how to get inside. The gate cannot be opened manually; the door is also locked. There is a car nearby and a jack nearby, and there is a pipe in the wheelbarrow that can be used as a lever. We bring the jack to the gate and hammer on [E] to raise the gate. The command “Inside!” to everyone. The doors need to be closed, a couple of kicks and Javi knocks the jack away from the gate. Shots are heard, it's David! Clem wants to keep David out, but Javi decides not to listen to her. Upon entering, David is questioned about what happened to the boy. It turns out that he survived, they themselves did not expect it, but he came to his senses. At this place they left the car and provisions, David came to say goodbye. The brothers' conversation is interrupted by a crowd of walkers who burst through the door. Without wasting a second, Jesus “carries” one of the walkers out the door in a jump. We need to prop it up with something. Javi finds the container and, with David's help, blocks the door. Tripp notices familiar writing on the container. This is all from Prescott. The warehouse contains not only items from Prescott, but also loot from other cities. Someone's conversation began to be heard nearby, the sound intensified. Everyone hid in cover. Three of David's soldiers showed up here. Well, the kids were caught red-handed. Max opens fire on command. David told Javi that his target was Badger. The younger brother follows him. We shorten ourselves from the falling rack and rise to the command post. A fight ensues. Click the buttons that appear. At the end of the battle, you can punish him for everything he did... for Marianne...

David finished off Max and let Javi finish what he started. He looks more harmless than Badger, he didn't do anything, didn't kill anyone. We get information from him. Max breaks down and says that Joan is behind all this, she gave the orders. Perhaps we should leave him alive, he will take us to Richmond and help us get inside.
Exiting the warehouse, Jesus decides to leave the group. Also, one of the three bandits has escaped, he can raise the alarm. It's time to move to Richmond. Tripp shares what he will tell Eleanor about his feelings when he returns. David knows the way to Richmond, bypassing all the patrols that will be waiting for us.
The group traveled through the sewers to Richmond. David suggests splitting up to work on two goals at once - Tripp will go after Eleanor, Javi will follow Kate and Gabe to the infirmary, and David and Max will go to Joan. What about Clem? She wants to find her friends at the New Frontier to find out where AJ is being held. Her further plans are to get into a car and get out of here.

Using , we move forward behind cover. Bandits pass nearby and discuss Javier. To move on, you need to divert their attention. We throw a stone at the glass on the door and pass by. Javi finds Kate and Gabe. Kate said Joan came by to tell her that David was no longer running the place. Javi tells her who Joan really is, that she is behind all this and that it was her people who shot Kate. We need to stop her, but Kate is against it, according to her, it’s none of our business. She just wants to run away. But Javi decides to go to David's house. Gabe misses Clem. Javi tells him that he came across her and that she could use a friend. Well, it's time to go.


The heroes meet Ava at the house. She says David is talking to Joan and may need help. But what about the family? They need to be protected. Ava says they will be safe in the house. Javi leaves them and goes to help with Ava. On the spot, Javi tells all the unaware members of the New Frontier what is really going on here. The group brought Max as proof that if he told the truth, he would live. People will know the truth. But Joan justifies her actions (robberies and murders) by saying that she was obtaining vital supplies for the group. Joan decides to take them to the cell, the brothers are forced to their knees and Javi is hit on the head...
Episode 4: Thicker Than Water
At the beginning of the episode, we are shown the past of the two brothers, when there was still life on earth... without the dead wandering around the area. They practice punches together. Some girl recognizes former sports star Javier Garcia and wants to get an autograph. Why not? As it turns out, she just wants to sell it. Well, "THIS IS NOT FOR SALE", walk away... The game doesn't work as David watches Javi hit all the balls without losing his form. Well, he's a former baseball star, so what? Everything is bad for David: his job sucks, he and his wife constantly quarrel. The man decides to join the army and asks Javi to look after his family. Of course you can count on it. It's worth supporting him at this moment.


Back to the present. David and his brother this time find themselves in the cell where he recently led Javi’s group. Joan's armed henchmen do not understand what is really happening and what she is. But after a while Joan herself appears. David seriously hates her, which is why he gets punched in the face when he tries to attack her. She plans to hold a meeting in the morning to explain to residents why he was arrested. After the conversation is over, David is taken with him. Okay, it's time to get out of this hole. You can try to leave through the door, but this is not a good idea, it is obviously closed. It’s better to try to get out through the window, you just can’t get to it. We select a stool behind the wall near the shower; with its help you can reach the window. You also need to use something to break the glass. We approach the sink and tear out the pipe, quickly press the [Q] key, then [E]. We break out the glass and try to get the grille out. Gabe comes to the rescue. He can’t cope alone, we help him by clicking on the key. The boy is worried about his father, unlike Kate, who has long forgotten David. It’s worth telling Gabe that he can handle it, we won’t leave him. The guys get to a safe place. Suddenly a stranger appears from the door. We quickly press to the side so as not to catch their eye.

You can hear Eleanor and Tripp talking outside the door. It looks like he found the moment to tell her about his feelings. Kate greets Javi with a hug. We will reciprocate her feelings. Tripp was clearly upset. The showdown is interrupted by Javi and the others entering the room. Some of the group plans to leave while they can. The streets are already filled with whole crowds of walkers. Everyone is hinting that we need to leave. But you can’t just throw David away, even though he’s an asshole, he’s still a brother. Gabe knows where to find weapons. Well, a couple of barrels definitely wouldn’t be superfluous. Tripp consults with Javi about Eleanor, who has no feelings for him. It looks like she needs time, maybe everything will change.
Ava and Gabe, led by Javi, set off to find the weapon. Ava decides to distract the guard at the door so she can get inside. Gabe questions her loyalty when he and Javi are alone. If David vouched for her, then she should be trusted. The answer convinces the guy. Ava takes the guard away, now you can get inside. We open the door and go in.

The door to the armory is closed. Of course. You can use a fire extinguisher as a key. Which is what Javi does. We hit the door several times, pressing the buttons that pop up on the screen. There are plenty of weapons here. Javi also gets himself a bat. Suddenly Ava creeps up from behind. It's time to leave, following the exit along the corridor, suddenly someone's steps are heard. We turn right and wait for the guard to pass. Suddenly Gabe decided to play a hero and attacks him. He ends up on the verge of death, but Javi gets into the fight and saves his ass. We often press a button, then another, to knock out the enemy. Javi gets stabbed in the shoulder. Thanks Gabe, what the fuck?
We drag the sleeping beauty to the restroom using the movement keys. After examining Javier's wound, Ava offers to help him. Dr. Lingard is nearby in the infirmary. It's worth checking him out.
At the infirmary, Javi notices the doc lying in a chair and...Clem? This is the meeting. Clem is here to find out from Lingard where AJ is being hidden. He looks like he's fast asleep. Clem notices Javi's wound and offers to stitch it up. While she is looking for a thread with a needle, Javi notices that something is wrong with her. She says that she began to bleed... this happens to women. Javi says it's growing up, it's okay.
It looks like the doctor is completely unconscious; even a slap on the cheek couldn’t wake him up. Okay, let's look around the room for now. In the upper right drawer we find codeine - a painkiller. Clem warns that they don't like stealing here, but who cares? There is a first aid kit on the tabletop, and mending tools have been found. In the drawer on the right you can also find a little thing for growing Clem, which will come in handy for her. We talk to Clem and she begins to stitch up Javi, simultaneously telling a story about the past.

We are transported back to that time. Clem is sitting in the trailer. Suddenly she hears footsteps on the street. Someone is clearly here, it’s worth getting a knife. Ava appears from the bushes. She brought some things for Clem. We examine things, but the main thing there is the drawing. This will remind her of the baby. Ava advises finding someone you can trust and who will trust you. In parting, Ava recommends one place - Prescott Airfield, if support is needed. Clem says goodbye to his friend, shaking her hand.
At the end of the story, she had already bandaged Javi's wound with all her might, great job. It's time to talk to the doctor. He's just coming to his senses. He says that it was thanks to David that the boy remained alive. Clem wants to find out from him where AJ is hidden. The doctor will tell only if he is given a killing injection. We agree to this and receive information. Don't forget to stick a knife in his head at the end so that he doesn't turn.
Now together they return to safety with the rest of the group. Eleanor says Kate lay down in the other room. Gabe shares the weapon he found with Clem, who refuses, but then agrees to take another gun so as not to offend Gabe. The group decides to speak at the trial. which will take place in the morning. They want to use the New Frontier truck to provide cover from walkers. Ava knows where it is, if it is stolen, no one will stop us. Kate and Clem enter the conversation. Gabe is trying to prove to everyone that he is cool and mature enough to go on such a task, he wants to prove himself. He is even ready to die to free his father. Javi protects him for now and tells him to cool down and not get into the heat. The little guy blurts out that Javi shot Conrad. Tripp can't believe it and immediately becomes furious. Tripp's trust, and with it Eleanor's, is lost to Javi.


The group approached the location of the truck. The plan is this: Javi and Clem go to the truck, and Gabe and Kate stand on the lookout. But Gabe is eager to fight, it’s good that in the end he stayed behind the fence. We head straight to the building. Outside the gate is the truck we need. We open the door with a button and Javi climbs inside...damn, there are enemies walking nearby! Press down to bend down. Kate and Gabe did not stand aside and also came to the truck. You can't start the engine, it will attract both walkers and guys nearby. Kate will steer and everyone else will push. We often press the button to make the truck roll. Having rolled the car to a safe distance, you can start it. But the problem is that no one put the key in the visor. You'll have to short-circuit the wires. But we don’t have the tools either. Clem notices things scattered everywhere, maybe there are tools somewhere. Javi finds a red toolbox. We reach for the wire cutters, but suddenly a walker grabs our hand. We aim at his skull and break it with one blow. Now we have the tools, we can get to work. Use a hammer to open the panel. We cut the blue, red and green wires alternately. Connect the blue and red wires. The light comes on. The walkers do not sleep, they immediately attack. We take the red and green wires and try to start the engine several times. Ready.
The group gets there and stops a few blocks before the square. All that remains is to wait for the sun to rise. During this time, Kate and Javi discuss the future of their children, maybe something will work out for Gabe and Clem. They also discuss their relationship. Kate wants to give her relationship with Javi a chance, but things get complicated when David is around, so she doesn't want him back. Javi also takes a liking to her and wants to see what happens.
Ava contacts the heroes on the radio and says that a demonstration execution has been staged in the square, Joan wants to hang David. The conversation ends abruptly. I wonder what happened? He will have to walk, if they notice or hear the car, they will immediately kill him. Kate stays in the car to pick them up later.
In the square, Joan curses everyone present and tries by any means to accuse David and hang him. She presents the bodies of Dr. Lingard and another person for everyone to see. Joan notices Javier in the crowd. She was waiting for us. Joan said that she and Eleanor had a conversation and she said that Javi wants to rally people against her. Soon, Joan brings out Tripp and Ava, who are tied up. She forces you to choose who to let live and who will die today. But regardless of our choice, Joan will still change it. That is, if we choose “Save Tripp”, then she will shoot him for “betrayal”, the same will happen with Ava - we choose “Save Ava”, then she will shoot her for “betrayal”. After this, Joan's people begin to doubt her adequacy. One of her people, Clint, is perplexed. It's worth provoking him to stop her. He negotiates a truce and everything goes towards the group taking David and leaving the city. We have a choice to kill Joan or make a pact with her. Considering what she has done, she has no place in this world. Javi makes a well-aimed shot right in the eye. Joan's henchmen knock over the stool and David ends up hanging. Press the buttons to the sides shown on the screen to shorten the shots. Then we shoot at the armed bandit. We climb onto the platform and save David by cutting the rope, then press [Q] to pull him to cover. David asks his son to help him, but Javi stops him, saying that we are not here for revenge. Nearby, Clementine was surrounded and could use some help. Kate radios us. She heard shots. Regardless of what we tell her, she will appear in the square. Unfortunately, one of the bandits throws a Molotov cocktail and the truck becomes uncontrollable. We jump to the side, the truck flies into the fence and breaks, leaking fuel provokes an explosion...
Episode 5: From the Gallows
Javi plays dominoes with his brother and father. We are given the chance to choose which domino to use. Choose any one you like. After the game, by chance, the brothers learn about their father's fatal illness.

After a short conversation, we are transported to the present, to an exploding truck. Javi rushes to the truck to help Kate. Along the way, we shoot at the walker, after which we immediately dodge to the left from enemy fire from behind. Press [Q] three times to keep the zombie away from the truck. This doesn't really stop him. It will be difficult to get close to him; Xavi is not allowed to stick his head out. Press the key three times again, this time [E], shooting blindly. There is a hit. We fight off the walker and overtake the truck. Kate is not inside.
Javi decides to talk to David about it. Together with him, the brothers go in search of Kate. A body that looked like her fell nearby. David goes to check, but the walker is quite nimble and attacks him. We help our brother escape by pressing [Q] and...here the work ends...Kate?! She is alive! David is clearly dissatisfied with the unfolding relationship between his brother and his ex-wife. But now there’s no time for that, we need to save our asses. Javi notices that Gabe and Clem need help; they are surrounded by walkers. But, apparently, they are coping quite well themselves. Clem taught the boy how to effectively disarm them with a blow to the knee. Crowds of walkers advance, the group decides to take refuge in a building.
Gabe is unhappy that Joan had to be killed and things turned out this way. Javi explains this by saying that in this case they were able to save David. But the little guy is just showing off.
David decides to check the other entrances to the building and make sure this is a safe place. He also invites Gabe to go with him, to which his son does not immediately readily agree and asks Javi for advice. He tells the boy to be careful, and on top of that, Clem is coming for company.
Left alone, Javi and Kate decide to find a safe place upstairs, away from the walkers. Kate begins to find advantages in the fact that Marianne, her daughter, did not live to see this day, did not see this horror that unfolded around her. She also blames herself for the break in the wall, to which Javi replies that it is not her fault and they will fix everything together.

Entering the room, they find Eleanor. She's not very happy with the guys. Javi is eventually willing to forgive her for going astray and trusting Joan. Eleanor is an excellent doctor and she truly wants to save lives and this place allows her to do that. One of the women here lost her daughter outside. It's terrible to lose a child in such a world...
It looks like this woman was completely blown away and pointed the gun at Javi. According to her, it was the fault of brother David that all this started; without him, everything was fine in Richmond. Javi refuses to admit his guilt. Kate stands at gunpoint and tries to persuade the desperate girl. Noticing that she has calmed down a little, David roughly takes the barrel away and throws it on the floor. It’s worth supporting him at least this time and saying thank you, because that crazy woman could have shot. After David wanted to kill the girl, the whole group turned against him. Kate says it's better to talk to him like a brother.


Javi finds his brother on the roof, standing on the edge and looking somewhere. Wow, he doesn't look like someone who would be suicidal. Come on, guy, just no nonsense. David asks his brother to come up to him. Well, we climb onto the parapet, hoping that nothing stupid will hit his brain. My God, the entire area below was filled with crowds of walking corpses. The brothers have a heart-to-heart conversation. Javi tries to cheer up his brother and understand him. After a while, Kate rises to the roof, followed by the others, including...Tripp. The group let him in at the last moment when he was on the street. It’s a little awkward, especially after that situation in the square. Javi doesn't regret what he did then. He would have done the same if that situation happened again. Eventually they make up. It’s already good, at least the relationship with someone has settled down.
The group is discussing where to go now, because there are crowds of zombies on the streets and they are, one might say, surrounded. Kate came up with a plan using construction equipment that she saw not far from the truck. It's good, everyone agrees. It's time to get off the roof. Javi notices the fire escape and jumps onto it, we manage to press [E]. The group moves to another roof.
Now it's time to talk. David wonders why Kate was so happy to see Javi that she hugged him. Javier leaves the conversation by telling him to ask her himself. This ends the serious conversation.
Below, the group notices a guy who was captured by the undead. David calms everyone down and gives an introduction. To survive you need to stick together and keep your eyes open. They move further along the roof. Now they encounter walkers on their way. Together with his brother, Javi clears the site. There are only a couple of walkers nearby, it’s boring.
Gabe talks to Javi along the way and admits that he used to want to grow up like his father, but now he looks at Javi and most of all hopes to become like him.
The path across the bridge is blocked by debris and junked cars. Kate is very afraid of heights, but she did it. It's our turn. Walking near the car, it began to slide a little and Javi almost fell down, thanks for everything to Tripp, he gave his hand in time. However, it was fortunate that we established contact with him. All that was left was for Tripp to get across. Wow, damn, as always some bad shit happens with the latter, a walker got out of the car and attacked Tripp, but no such luck. The big man threw it over himself and miraculously escaped. Well done, though.
Having reached the end of the bridge, Javi talks to Clem about David. David himself hears the conversation and tells why he had to give AJ up. Javi supports his brother and says that he did everything right. Clem also does not stand aside.


Javi inspects the bridge and the helicopter hanging from the wreckage. It's worth checking out the helicopter, the hanging half of the parachutist, the destroyed bridge itself, and the water tower. Looks like we're getting close already.
The only way to the other side is to use the blades to fly over to the other side of the bridge. Risky. Well, there is no other way. Gabe goes first, then Clem, then Kate. So far everything is going well, although Kate already had doubts about this idea. Children are one thing, but here the weight is a little more. Javi persuades his brother to go next. He comes next. Well, it looks like it all ends with Xavi. The blade breaks and sags down. Use the keys to go upstairs. We have to be careful, because half of the pilot is still in our hands and can grab us. Press the key to the right to place the body on the reinforcement. The path is clear, we calmly climb up. Javi was able to save his skin, but what to do with Tripp, he won’t be able to get over. You can't just throw him away. He tries to shoot back, but falls down along with a couple of walkers. There is a possibility that he still survived.
Having reached the place, the group decides to somehow distract the walkers in order to gain access to the equipment. Gabe notices a generator that needs to be turned on to distract them. Meanwhile, Clem suggests cutting open the belly of some walker and smearing himself with his entrails. She is no stranger to this, but the team looks at it with wildness. Looks like Javier will have to do it.


Javi decides to hide behind a box and distract one walker who got away by whistling. Well, then it’s a small matter, use the mouse and follow further prompts on the screen to cut up the carrion. Now we carefully pass by the walkers, trying not to touch them. The smell of guts overpowers the smell of the “survivor”, so it’s not so difficult to get to the generator. Open the generator cover and press the button. The process has begun.
In the garage, seeing the car, David decides to leave this place and, of course, take with him the others who want to. Javi protests and says that the plan was completely different, it's suicide. Gabe takes David's side. Well, dude, this is not the time when you were expected to reunite with your father. Kate freaked out and told David she was done with him. Finally! Javi confirms her words, saying that they love each other. Maybe you shouldn't have done this. David was offended by this and a fight broke out. Events are unfolding rapidly. Javi keeps saying that he loves his brother, but he does not slow down, but only reaches for the wrench. Well, now Gabe has also fallen into the hands of his angry father. Everything is put in place by the shot at David. This was Clem. It was time for someone to end this. But a crowd of walkers came to the sound. The group managed to fight back and take refuge in the garage, but...David, what the hell? He closed the garage from the outside and left with Gabe in the pickup.
We can’t wait any longer, there are people left in Richmond and they need to be saved. Kate wants to take a bulldozer and go save people, and Clementine will follow Javi, where he goes, she goes. Gabe chose a side, he wanted to leave with David, so we need to help Kate save people in Richmond. Javi finds a weapon in a box in the garage.

In Richmond it's already underway defense. Jesus, it’s unexpected to see him here, and in this guise. At the entrance to the gate we shoot the undead. Kate commands to climb into the ladle. This is prevented by a walker who grabbed Javi by the leg. We deal with him and jump into the bucket. Kate lifts him higher so Javi can reach the gate opener. Here we will find many buttons and levers. The one we need is green (topmost).
In the city, a bulldozer drives out into a crowd of walkers, Javi commands “full speed ahead” and starts distributing it to everyone from the machine gun, all you have to do is press the buttons. The AK's cartridges are running out and now Kate takes over. We change places with her and take control of the bulldozer. We use the keyboard to guide the colossus in the desired direction. We select the truck and block the passage for walkers.

After a while, Clem says that we need to go after Gabe. Their car was in an accident and David is already dead; Gabe was not much luckier. He was bitten. We give the boy a gun so that he can commit suicide and not turn into this creature.
After 3 days
At the church, Javi and Kate hung another photo of Gabe, on the memorial wall, with the other victims.
Kate tells Javi that she wants to start a family, he is not against it, and agrees to it. Silence and calm reigned again on the streets of Richmond. Walkers are out of reach behind the walls. In the courtyard, Javi meets Jesus, who intends to leave this place, and he sees something in us, believes that Javi can lead these people. Why not? After all, everything has fallen into place, everything is safe, it’s time to settle down. It seems it's time for Clem to go get the baby. But before she goes, she asks one favor. Looks like she needs to clean up her act, a new hairstyle would be a great idea. At this point, Clem says goodbye to everyone and leaves Richmond in search of his boy.

Congratulations, the fifth episode is over, and with it, Season 3 of The Walking Dead.
"Javier and his family accidentally cross paths with a hostile group, and a simple misunderstanding escalates into an uncontrollable skirmish."
"Memories from the Past"
As soon as the cutscene ends, control will pass to you. First of all, talk to David near the house. When Gabe appears, you will need to decide what to say, and after choosing, you will either accept David's hand or refuse help. As for the dialogue with Gabe, you will need to answer with the following phrase: .
As soon as the two brothers sit down on the porch of the house, David will say that he loves you, so you will have to answer, so choose your answer carefully: , . After answering, continue communicating with your mother, after the dialogue, with whom it will be time for a cut-scene.

"Currently"
It turns out that the events presented before were only memories, so now you have returned to the present time. First of all, talk to Kate. Inside the car you will need to choose one answer: , , .
Immediately after answering, Kate will offer to smoke, so you will need to make another decision: , .
As soon as the girl smoothly moves on to the topic of sex, she will need to decide again: , , .
Talk to everyone who is available. At one certain moment, you will soon find yourself in an old abandoned landfill. First of all, kill the walking dead by pressing the same key “E” several times. And as soon as Gabe leaves you, you can talk to Mariana: , .
However, the conversation with the girl will not end at this point. The next answer option will have to be chosen when she says that the batteries in the player ran out a couple of days ago: , .
As soon as control returns to your caring hands, you can finally search the landfill. After a thorough inspection, go to the booth on the left side. Mariana will be sitting in this booth and you will need to talk to her once again. This time she will talk about how she needs a pen in order to write down everything that she remembers today about her past. At the same moment you have to choose what to say to her: , .
At the landfill it will be possible to inspect: barrels with used oil, once broken glass bus on the right side and a little further on the old mattress (you can even try to move it). However, in any case, you will need to go a little forward to find Kate there and talk about the herd and the situation as a whole. After a short conversation, go to the left side of the girl - there will be a canister on the left side. You just need to inspect the canister now, then turn right and turn your attention to the car.

Did you see the car? So now inspect it, or you can immediately “poke” on the canister icon to start pumping gasoline. At the same moment, walkers will suddenly crawl out from under the car, so press the “S” key. Once the living corpses have found their eternal rest, continue pumping out all the gasoline. Pumped out? Then go now to the right side and pump out gasoline from another car. When you deal with the second car, then pay attention that in the background, Gabe will be sitting on a container, and a little further away there will be a truck standing all alone. So, you will also need to drain all the gasoline from the truck, and then talk to Gabe.
After a short conversation, go further and find the stairs. However, before the next action there will be a choice - to go up or stay down. If you get up, then Kate will call out to Javier, after which she will also call out to Gabe. Eventually the two men will climb up and jump over the large container.
Now it's time to inspect the ambulance van: examine the gas tank, break out the roof (using a crowbar), and then do the usual thing - pumping out gasoline. At one point, as usual, the walking dead will appear. To kill him, press the “Q” key. After the murder, go to the house. Inspect the doors, which will be locked, so use the crowbar and use it on the handle. It won't work. It's time to look through the door window - this is how you will find a hatch in the floor. Click on the right mouse button and exit the zoom. Go down and on the right side, at the bottom of the house you can find a wooden panel. The panel will be movable, so move it aside and crawl further under the house to get inside through the hatch that you previously noticed inside.
Once inside, study everything carefully. Open the drawer on the right side and thus you will find batteries - take them. In the background there will be shelves with products - carefully examine them. After searching the house, you can go back and talk with all members of the group.
It's time to make a serious choice: either. But that's not all, because after that you will need to make the following decision, but only if you got the batteries in the box: , .
A little later it turns out that it doesn’t matter whether you agreed with Kate or the children, because you will have to linger in any case, since there is a flock nearby. And by talking to Kate outside, you can get a chocolate bar from her. When you first meet the bandits, you can choose absolutely any answer. In any case, you will be left alone with a dark-skinned man, but don’t be too scared of him: immediately grab the crowbar that lies on the windowsill, and then kill the bandit. When you manage to kill him, a cut-scene will occur.

After the cutscene and cutscene, during which you get into an accident, you will have to make a very important choice: or.

As soon as a gun is pointed at Javier's back, he has to choose what to say: , , .
So, the person with the gun will be Clementine (and you heard right). The girl will take out a chocolate bar, after which she will need to choose what to say next: , .
The girl will ask for Javier's family van in exchange for her services. However, whether you agree or refuse, the outcome will still be the same - Clementine and Javier will go back to the landfill to sort everything out.

While you are on the road, you can chat a little and discuss a lot. The first dialog to look at will have the following dialog options: , .
At a certain point in the journey, the heroes stumble upon a pack of the walking dead, but nothing complicated, just a little later the conversation will continue again. Soon Clementine will remember your answer: , . After this dialogue, you will need to deal with the dead one more time. Then you will find yourself in Prescott territory.

First, look around the bar inside and talk to the people playing cards near the bar. You can also help Francine or tell her you don't play cards. Before the game, know that Conrad will always have the winning hand, so it would be best to tell Francine to pass.
Let's move on: talk to the bald man who will slip Clementine fake cartridges. First you have to knock the knife out of his hands, and then just wait for the moment Clementine shoots him. At the same moment, a certain Tripp and other unknown people will come running, so an important decision has to be made: or.
What were the consequences of the shooting and murder? , .
After Tripp leaves you, you will need to choose one of the answer options, but only if you covered Clementine: , .
As soon as Eleanor appears and asks to tell you what really happened, then you will need to answer her with one of the suggested lines: , .

You will meet with Eleanor even if you choose other answer options and are locked in a cell. True, you will meet her in a completely different place, but, nevertheless, the conversation will 100% take place, so don’t worry.
The doctor will suggest that you go to the dump together at night. Therefore, it will be possible to decide exactly what to do in this case: or.
Depending on who you choose (a girl or a man), one extra dialogue appears, but only with one of the two people. No more, no less. However, this small branching does not play any important role, because the development of further events will be the same.
The memory will not last long and everything is quite simple. First of all, go to the car and open the doors, first pulling the handle. Continue shooting at the two walkers and thereby saving AJ. Next, open the doors to free your hand.
"The present"
If you go to the landfill at night with Eleanor, then you can talk with her about Tripp: , .

Pick up the pickaxe from the ground, inspect the player, and then quickly kill the walking dead. After the murder, you can talk to Mariana, and also find Gabe and Kate, who are hiding in the truck. However, after this you will need to deal with several more walkers. Then, after all these actions, you can calmly talk to Kate: , , .
As soon as Kate asks about the girl next to you (we're talking about Clementine), the following lines will be given to choose from: , , . After a short conversation, a cut-scene will begin and continue watching it until you have a choice: shoot the enemies, or run to your family.
At a certain point, Eleanor will inform you that it is necessary to return back to the city as quickly as possible. However, at the same time, Clementine will insist that the bandits will need to be dealt with right here and right now, so the choice is: or.

Walkthrough “Episode - 2: Unbreakable Ties” (Part 2)
“Overcoming adversity after adversity, Javier leads a group of refugees to safety in a nearby town.”
"Memories from Javier's Past"
First of all, talk to Kate. During the conversation, an important decision will soon be made, which Kate will remember: , .
When Kate puts Javier's hand to hers, she has to decide once again what to do now: , .

First key decision. Now you have to make a very important choice when David appears. You need to choose what to do: , . In the first option, Javier will take it and say that Kate is going to leave David.
"The present"
So what you're going to have now is an injured Kate. Hold down the left mouse button to rest your hands on the open bullet wound. At a certain point, Gabe will say that he wants to help, so you will need to decide what to say: , .
In any case, after this decision it will be necessary to help Eleanor carry out the operation. Then we need to talk. And as soon as you can move, you will need to talk to Tripp, who will be doing something under the hood of the van. Also keep in mind that in the depths of the screen you can pick up a bottle of water from the table.

Tripp will soon make up his mind, so he will offer to stay in Prescott, so he will need to choose what to answer: , .

Go to Conrad, who is located at the front gate on the right side, and then talk to him about everything you can. After the conversation, go through the gate to find Gabe, where you will have to decide once again what exactly to do: , .
The next dialogue will soon follow, in which you will need to select another key phrase. So: , .
At one point, the peace will be disrupted by the appearance of Clementine, who is being pursued by bandits. You will need to talk to them a little, but when they show Francis, you will have to decide how to answer: , . And whether you finally agree to go down or not - it doesn’t matter. The shooting will begin in any case, so get ready for decisive action and brace yourself.
Second key decision. One more detail depends on your key decision: or.
After this decision, you will still have to deal with the bandits, deal with the dead, and finally, you will have to leave what remains of the damaged peaceful town of Prescott. As soon as you stop, you will have to talk to Conrad, and then calm Gabe: , .
Now it's time to talk to Eleanorm about Clementine and Gabe: , .

Now pay attention, because if you took a bottle of water from the table in Prescott, you will have the opportunity to give water to Kate. To do this you will need to talk to the girl. During the dialogue, she will remember your words, keep in mind: , .
Soon you will reach a place where you will find yourself in front of a tunnel, the path through which will be blocked by a car. The first thing you need to do is talk to everyone. Next, you will need to try to move the car, although nothing will work.
Now talk to Tripp and the rest of the guys. After the conversation, go to the left side closer to the van in which Tripp traveled with Conrad. Thus, you will come across a garage door that will need to be raised. There will be a dead man inside, so quickly pick up the wrench and kill him. Next, carefully inspect the winch after connecting the power. Now you can go to the right side to the red car (Gabe will still be climbing near this car). So, open the trunk and take out the “crocodiles” from there. Together with them, it's time to return back to the car with the winch inside the garage. You will need to use the same “crocodiles” on the car battery in the garage to use them to connect the car battery to the battery in Tripp’s van.

However, before you can extend the winch, you will need to use the wrench on the switch on the right side. Next, use a winch to move the car. Walkers will appear as usual, so you will need to deal with them. However, in any case, you will have to run away from them and hide on the roof.
Soon you will notice a rather strange silhouette. We'll have to go in his direction. When you get there, sneak up from behind and first of all interrogate the strange person. Suddenly a bearded and long-haired man appears. During the conversation, among other things, learn about how things are going in Richmond now. In response to this, he will offer to go through the railway tunnel.
Third key decision. Now we have to decide what to do with this unknown man :), . I hope you already understand that this is the same Jesus.

"Memories from Clementine's Past"
Knock down the trailer doors, after which you will need to barricade yourself. Next, open the doors for the woman to let her inside. It soon turns out that the girl is a member of the New Frontier group. Moreover, she will also offer to go with her: , . However, no matter how you choose the option in this dialogue now, Clementine will still have time to visit the “New Frontier” group and this cannot be avoided.

"The present"
While moving through the tunnel, talk to Clementine and find out more about the New Frontier. At the end of the dialogue you have to choose a key answer: , .
Soon you will have to cross the train. Along the way, you will need to break the pipe and insert it into the doors so that it blocks the passage for the walking dead. At a certain moment, Conrad will attack you.
Fourth key decision. In any case, no matter what you choose, Javier will take out his weapon and you will have to decide what to do: or.

Get out of this tunnel quickly and talk to Tripp first. His question about Conrad’s fate must be answered as you see fit: , .
In case you decide that Conrad is not worth killing, then this madman will tell Tripp everything (that Clementine is a member of the New Frontier). In this case, the last scene will change, because instead of when you lower the weapon, you will have to show Clementine. But in any case, when you get to the gates of Richmond with Kate, you will need to talk to that same thug.
Fifth key decision. You will need to choose what to do: or.
Moreover, if you decide to lower your weapon, you will need to agree or refuse to put your hands on the back of your head: or.
Thus, your choice will turn out to be one of the most important during the entire second episode: or. However, in any case, the gate will open, after which there will be a meeting with someone whom you could hardly expect to see here...

Walkthrough "Episode - 3: Outlaw"
"Shocking discoveries drive a wedge between brothers in arms"
"Javi's Memories"
The third episode begins with an important flashback to the main character, Kate and the two kids. As soon as control passes to you, talk to Kate in any convenient form. After this, take out the white gas cylinder from the van. When you get it, continue the conversation. The conversation will soon be interrupted by a walker, so kill him and talk to Kate again. However, this time you will have to make a very important choice, choosing one of the two lines presented: “We must go back” (Kate will remember this), “I’m with you Kate” (Kate will remember this.) Once in the house, talk to the children and tell them that it is time to move in. An introductory cutscene will occur.
"Present Time, Camp"
Talk to your brother, and then talk to your friends who are sitting in the cell. At this stage of the passage you will need to either agree during a conversation with Tripp, or convince him that David can be trusted.

In any case, you will need to get to know all the residents of Richmond, and then be sure to talk to Kate. Moreover, during the dialogue with her, you will again have to make an important choice: promise the girl to leave the “New Frontier” or declare that they should all stay with David. A little later, you can tell your brother about exactly how Mariana died.
When the moment comes to meet Joan and other Richmond leaders in the hall, a choice will come. You will have to either follow David’s advice and thereby say nothing about Mariana’s murder, the raids by Max and Badger, or simply blame them. Thus, two dialogue options will appear in the window: “Demand retribution for Mariana’s murder” and “Listen to David and remain silent.” However, one way or another, the main character will be thrown out of court, if not because of accusations, then because of “theft,” so there will still be a reason to kick Javier out.
"Beyond Richmond"
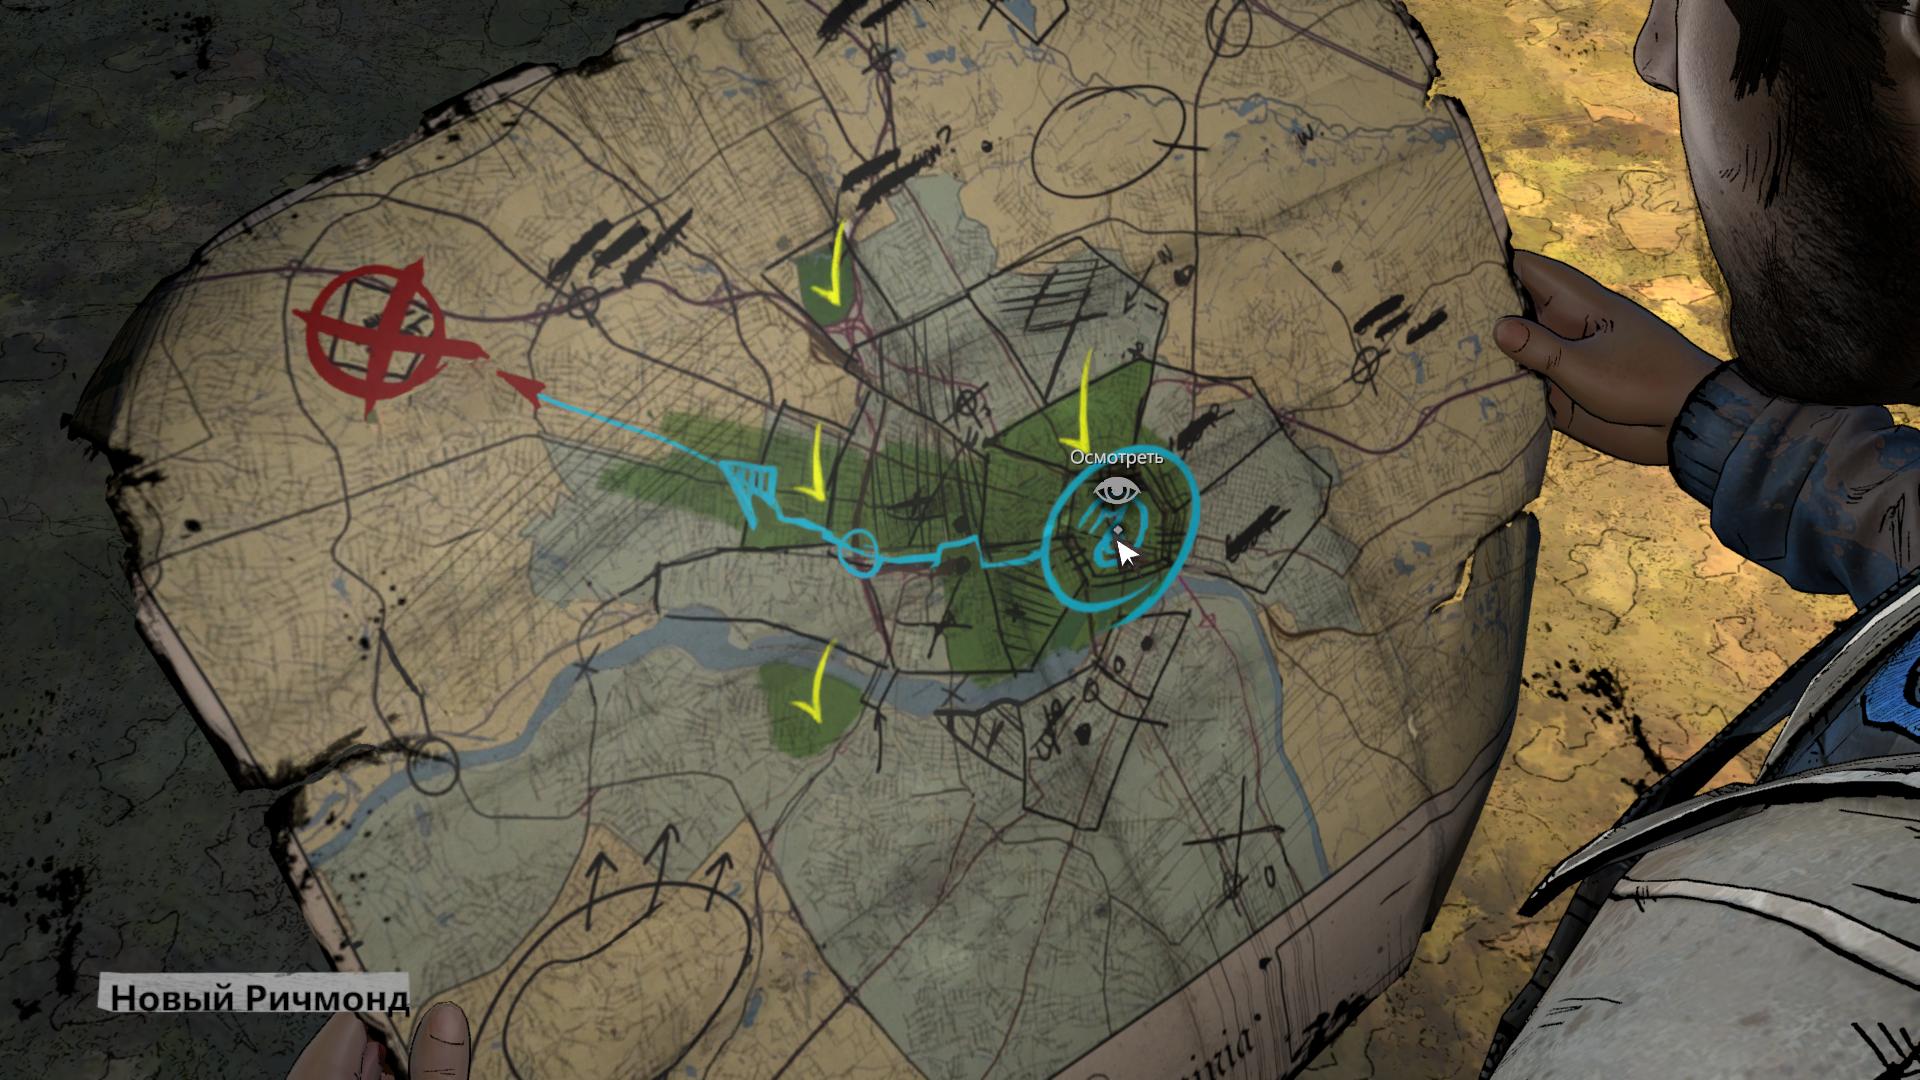
Open the bag, take it out baseball bat and study the map carefully. Click on three points on the map: the first point is Richmond, the second is a blue circle, the third point is a red circle in the upper left corner, which will have the inscription “Building”.
Now take the pistol, and then make another very important choice: give Conrad the pistol or keep it for yourself (of course, provided that Conrad is alive). Next, follow through the forest, chatting with Tripp along the way. At the end you will have to deal with the dead (to do this, it will be enough to press the indicated keys at the right time).
"Clementine's Memories"
Very soon, Clementine will decide to tell Javier about how she was expelled from the New Frontier. Move forward very carefully all the way to the tent, where you will need to calm AJ (choose the option with humming in order to calm him down). After the chant, select a first aid kit and find the necessary medicine. Take the syringe from there, then listen carefully to the doctor.
So, after Clementine has obtained the injection syringe, she will have to decide: “Still inject AJ” or “Don’t inject the baby.” Moreover, no matter what choice is made, there will be no medicine left - it will either break or you will inject it. At the end, AJ will be taken away, although they will be allowed to say goodbye to him - you will have to agree to leave, but in the end you can spit in David’s face.
"Stock"
Once you are behind the fence, you will need to open the gate that leads to the warehouse. Carefully inspect this gate and try to lift it. After this, go to the left side of the car and look for a jack under the rear fender. However, it turns out that the handle from it is inside the car, so open the doors, kill the dead man inside and take the handle, then freely lift the gate.
Inside, you will need to decide whether it is worth opening the doors to David or whether it is better to listen to Clementine in this regard. Ultimately, either Jesus or Javier will open the doors (Jesus will open the door if he listens to Clementine). Next you will need to move a rather massive box to the doors. By the way, this is the very place where Conrad will die, but only if he remains alive in the second episode of the game. However, in any case, after this you will have to deal with the raiders, mainly the Badger.
Now we have to decide what exactly to do with the Badger, and there are four options for solving the problem: “Allow the Badger to turn into a walker”; "Kill the Badger quickly"; “Break the Badger’s skull”; "Let Tripp kill Barusuk." Although this is not all that remains to be done. You will also have to decide exactly what to do with Max: take him to Richmond in order to blame Joan for everything, or simply kill him.

"Return to Richmond"
Outside, be sure to say goodbye to Paul (aka Jesus), and then you can safely head to Richmond. As soon as you find yourself behind yellow car, then feel free to throw a stone at a power pole. After this, you will be able to talk to Gabe and Kate. And again, you will have to make a key decision.
There are two options to choose from: “Agree with Gabe and stay to help David in his confrontation with Joan” or “Agree with Kate about leaving Richmond.” What follows is a scene that will occur regardless of what actions were taken.
If you agree with Kate, then Gabe will decide to stay after all. However, you will still be caught, so find yourself in the hall with Joan, plus David will accuse you of betrayal. However, if you agree with Gabe, then although you will again find yourself in the hall with Joan, David will be more grateful.
Thus, in the first case, it will end with David picking up a gun and starting shooting at absolutely everyone, but in the second case, it will end with you being arrested (provided that Max remains alive).
Walkthrough "Episode - 4: Thicker than Water"
“When the group is threatened from within, Javier forges unlikely alliances to protect those he loves.”
Chapter 1: "Test"
Watching a butterfly on a tree, we can touch it. When Sarah finishes her business, we return to the truck together. The stop was short-lived; we would be tied up again and sent to the rest of the prisoners. Along the way, Kenny gets the idea to escape. First, he will ask us to find something sharp that will allow us to free ourselves from the ropes. Ignoring warnings from Rebecca and Carlos, Kenny will continue to stick to his line. Let's support him or the group.
Chapter 2: "House, Terrible House"
The camp occupies a huge area shopping center. There is plenty of food here, it is safe and, most importantly, strict discipline. The only thing to be afraid of is a flock of lurkers approaching from the south. Carver hopes they will pass by.
Carlos will be taken to the infirmary, and everyone else will be taken to a fenced area outside, in which the guilty members of the group are staying. One of these turned out to be Reggie, who actively helped the fugitives. He lost his arm after being bitten by a walker, but surgical amputation helped him survive. In addition to Reggie, Mike and a strange girl live here, who was recently discovered near the camp, smeared with the entrails of walkers. After Alvin is taken to Carver (assuming he survived the previous episode), Troy will ask Reggie to make sure the night goes off without incident before leaving. For good behavior, Carver is ready to accept Reggie back into the group and Troy is ready to help him with this.
Kenny is determined to escape. He'll distract Reggie so we can take a good look around. Interacting with the boarded-up plywood fence and gate on the right side is enough to attract Troy's attention. Reggie will lose the support and trust that will guarantee him a long-term bird's license in the community.
Chapter 3: "Quiet and Calm"
Waking up from Troy's kick, we gather with the others in front of the gate and listen to Carver's speech. Walkers began to show activity along the fence. In addition to this, the pack got a little closer to the camp. Reggie got a second chance, and today he will have another test. Sarah will speak to us, which the speaker will not like very much, and he will force Carlos to punish his daughter with a strong slap in the face.
We go to the armory, where we will work under the supervision of Bonnie. The girl regrets her actions and will apologize for them. She does not share Carver's methods, but respects him for keeping the community safe. Tavia will come for us to take us to the greenhouse. Before leaving, we receive a warm jacket as a gift from Bonnie.
Chapter 4: "Too Far"
In the greenhouse we will meet Sarah, discouraged by her father’s act. Soon Reggie will arrive here, who is tasked with monitoring our work, which consists of picking berries and cutting dry twigs. Reggie is worried about Sarah, because his reputation partly depends on her. In any case, whether it's helping Sarah or doing his job, Carver will be dissatisfied with the results and will punish Reggie... with death, by throwing him off the roof.
Chapter 5: "Breakthrough"

We return to Bonnie again and, at her request, take the bucket of nails to the guys repairing the last store. We keep silent or talk about what happened to Reggie.
Having reached the store, we find a fight between Kenny and Mike because of the former’s refusal to do dirty work. We are trying to calm the guys down and again we can tell or keep silent about Reggie’s death. Walkers made their way inside through boarded-up windows. We grab the board and hit the enemy on the head several times. Then we quickly hide behind the rack on the left side and continue to hold down the left movement button. Having crossed to the other end, quickly and often press the buttons shown. We continue to fight off the walkers with improvised means: we select a sledgehammer or a ladder and make a blow. We run into the next room by pressing the “back” movement button. We try to free ourselves from the power cable or select a screwdriver. In any case, Troy will help us.
On the way back, Luke will finally make himself known. He had been following us since the ski lodge. To calculate the patrol schedule, he will need a walkie-talkie. The devices are left to charge overnight in the warehouse. Having agreed to meet tomorrow in the same place and at the same time, we leave the comic book store and, after explaining ourselves to Troy, we go to Carver.
Chapter 6: "Expansion"
Rebecca will run out of the office, all in tears. Carver beat Alvin unconscious and, in order not to end up in the latter’s place, advised him to be frank with him. Carver admits that he sympathized with Reggie and ended his life only because he was weak in spirit. It was in us, in the little girl, that Bill saw the potential. Therefore, he will not beat around the bush and will clearly outline his position, which he will try to instill in us. We approve or reject the methods of the newly minted mentor. The conversation will be interrupted by Tavia with the message that Troy messed up the loading dock door and now it won’t close all the way.
Returning to the yard, we discuss with the group a plan for further action. Kenny suggests setting the walkers on the camp by attracting their attention with a loud sound, and Rebecca insists on getting Luke a walkie-talkie and waiting for the right moment to escape. Both options are good in their own way and should be implemented. Jane, who remains aloof, will also have her say. She will tell you about a disguise consisting of the entrails of the dead, which will allow you to walk right through a crowd of walkers without fear of being eaten. The only thing left to figure out is how to get to the warehouse where the radios are left to charge overnight. And again Jane will hasten to please us. A winch with a rope will allow you to climb to the roof and from there enter the warehouse.
Chapter 7: "Breaking and Entering"

Mike will help you reach the rope - we grab it and pull it down. Going upstairs, Mike will notice how Troy will begin to return to the yard, so we quickly cling to the ladder and climb onto the roof ourselves. Turning right, we get to the glass hatch and through it we penetrate into the warehouse. We move forward until there is a box under us. Jumping lower and lower, we get closer to the charging station of the walkie-talkies. The task of repairing the door broken by Troy fell on Tavia's shoulders, but the lack of materials puts an end to this matter. Having waited until Tavia is at the door at the other end of the room, we run up to the charging station and, holding down the interaction button and pulling up, we pick up two walkie-talkies. We return to the yard, jump onto Mike and show the group the obtained radios. Tomorrow is a hard day, before which you need to get a good night's sleep.
Chapter 8: "Born to Run"
Rebecca, Sarah, Nick (assuming he survived the previous episode) and Jane will be taken to work by Tavia. Troy will come for the rest a little later. During this short time, together with Kenny and Mike, we decide who will take the radio to Luke. In any case, we will have to do this. When Bonnie takes us to her workshop, we tell her about the walkie-talkie or ask her to return to Kenny. One way or another, we can get to the comic book store.
Chapter 9: "Communication Failure"
Luke will not respond, so we inspect everything until Troy appears and finds us in the wrong place. There is no need to look around; you can leave the store immediately.
Chapter 10: "An Eye for an Eye"
As you might have guessed, Luke was captured. Carver will demand a second radio. Kenny will take the blame no matter what we try to answer and hand the radio over to Carver. There was no question of any forgiveness: Kenny would be beaten until he lost consciousness. Bonnie's appearance with news of the walker breakthrough may even have saved his life. Carver will leave Bonnie to look after the prisoners - not the best decision, given that she finally decided for herself to take our side and help with the escape.
We are discussing further actions with the group. Luke advises not to rush to escape, especially since Kenny is now in very bad condition. The rest of the group are confident that there may not be another chance. Carlos did everything he could. Kenny will likely lose sight in one eye. Fortunately, even after such serious injuries, he will wake up and join us. Now nothing will interfere with the implementation of the second part of the plan - setting the walkers against the camp. In case we have to split up, we agree to meet at Parker Run, which is a couple of miles north.
Chapter 11: "Confusion"

We climb onto the roof in the usual way and make our way to Carver’s office. We examine Alvin or immediately head to the public address system at the table. Turn on the external speakers and turn the volume control to maximum. We try to start the receiver located on the right side. There is a disk on the bottom shelf a little to the left - insert it into the receiver. It worked! Bonnie will release the group. If Alvin is present in the office, then he will cover us, otherwise we can first get the pistol from the desk drawer, and then we will definitely block the door and go to the warehouse.
We shoot at Carver or jump on him. The hour of reckoning has come: we stay to watch the brutal reprisal committed by Kenny or we leave with the others.
Chapter 12: "Entropy"
Walkers are approaching from all sides. Having received a hatchet from Luke, we deliver an accurate blow to the enemy’s head. We dismember the corpse and smear ourselves with entrails on Jane's advice. Then we help Sarah disguise herself. Suddenly Troy appears and almost messes up all the cards. Jane will neutralize the threat and we can begin to move through the crowd. At some point, Carlos will be shot and the walkers will immediately attack him. Sarah will run away in panic. We strike the head of the first walker, dodge the second and deal with the third. We make the final choice: cut off Sarita’s hand or simply get rid of the walker clinging to her.
Third person view of the game.
Controls: keyboard and mouse.
Moving is carried out using the keyboard buttons: W, A, S, D.
If you hover over the active point, a list of possible interactions will be displayed. To select one of the options, roll the mouse wheel and click the left mouse button. To select options for lines in dialogues, in addition to this method, you can also use the number buttons on the keyboard. Only the replica needs to be selected within a certain period of time, which the scale will show.
The inventory is on the left side of the screen. If an item can be used somewhere, it will be indicated in the list of interactions to the corresponding active point.
To exit to the main menu, press Esc.
The game is non-linear. This passage option is only one of the possible ones.
Chapter 1: Empty City
Lee and Kenny walk through the city looking for supplies. Select 1 replica twice. Once at the pharmacy, Kenny will climb the ladder onto the truck. Try to climb up behind him, but the ladder will break. We need to find another way. Approach the jeep on the left. In a close-up view, you will see a winch on the front. Grab it and answer Kenny 2 with a line. Attach the cable under the truck. Approach the jeep again and press the button near the door to start the winch.
Select 1 replica. When the winch pulls the jeep towards the truck, climb onto it. Select 1 replica. Grab Kenny's hand, but he won't be able to pull you onto the truck. Select 1 replica.
Chapter 1: The Price of Life
At this moment, a girl will run out of a nearby building, pursued by zombies. Select 1 replica. If you leave the girl alive, she will attract zombies and you and Kenny will have more time to collect supplies. Therefore, click on the right mouse button to lower the rifle.
Kenny will manage to drag you onto the truck, and from there you and him will make your way to the pharmacy. Collect all the supplies that are lying in front of you on the floor and shelves. Then press A to go to the second zone (collect everything that is on the shelf and in the nightstand there), and then press A again and you will find yourself in the third zone (collect everything that is there). If you press D, you will go around all three zones in the opposite direction. Act quickly as a timeline will appear after a certain period. When it ends, the zombies will come. If you manage to collect all the supplies, Lee will tell you about it.
Chapter 2: Deja Vu
When it's time to leave, Kenny will jump over the counter and you will follow him. On the way to the exit you will be crushed by a door that was broken down by zombies. Quickly press Q until the arrows come together, and then press E. When you get to your feet, knock over the refrigerator to the right of the door to block the zombies' path. Then run to Kenny. When you meet a walker on the way, hit him twice. After that, quickly press Q until the arrows come together, and then press E. After leaving the pharmacy, Lee and Kenny return to the motel.
In a conversation with Lilly, choose the following lines: 1, 3, 1, 2, 1. When you go out into the yard, choose 1 line.
Go to Lilly's room (door on the left) and select 1 replica twice. Lilly will tell you that antibiotics containing opium are disappearing. She wants you to find out who the thief is. Lilly will also give you a broken lantern that she found in the trash. He could be evidence. Choose 2 lines to agree to help.
Chapter 3: Oddities at the Motel
When Lee leaves the room, he will see Duck, who overheard the conversation and wants to help you. Select line 3 to agree.
Go right and go up the stairs to Carly. Choose line 2 twice and then 1 to agree to Carly's offer to tell others that you are a convicted murderer. Ask Carly all the questions. Then go right and talk to Clementine. In a conversation, select 1 line. Also ask her about the broken lantern. Go right and talk to Kenny, calling him for a minute. Select replica 2. Next, talk to Katya, calling her for a minute. Select replica 2 times. Start a conversation with Kenny or Katya and ask them all the questions. Katya will tell you that she saw broken glass near the ice machine. Go to Lilly's room and tell her about your secret. Select 1 replica. Go back to her room and talk about everything else. Then go left to the van Ben is sitting on and talk to him. Select replica 2. Ask Ben the rest of your questions. Go up the stairs to Carly and tell her the results.
Then go left past the van to the fence. Broken glass lies on the asphalt near the drawings. Look at him and use your hand. You will find out that the glass is from a lantern. Lee looks around the corner and sees a cross drawn with pink chalk on the wall. Look at him and use your hand. Ask Ben, Kenny, Katya and Carly about the chalk. Then talk to Clementine. You find out that she had a pink crayon, but it disappeared somewhere.
At this moment, Duck will call you and tell you that he found a pink chalk near the gate. There is also a trace of him there. When you approach the gate, give Duck a high five and talk to him. Look at the crayon mark and apply your hand to it. Exit the gate and go right all the way. Open the grate on the wall. Behind it lies some kind of package. Take it. The package will contain the missing medications.
Lee will take the package to Lilly. During the conversation, she will see through the window that the bandits have captured everyone else. Lilly will take the rifle and climb out through the window, and Lee will have to distract the bandits. Choose 1 line, and then 3. At this time, Lilly will shoot one of the bandits, and Carly will shoot two more. When the fourth one climbs over the fence, shoot at him, but miss. He will call other bandits from the forest. So the whole group must quickly load into the van and leave from here. And you will cover people.
Lean out from behind the van by pressing A and shoot the two bandits hiding behind the fence. They will get closer and closer, so time is limited. Once the two thugs are killed, Carly and Ben will be able to run into the van. Lean out from behind the van by pressing D and shoot three more bandits in the same way. Now Clementine will be in the van too. At this time, Katya and Dak will be attacked by zombies. Shoot him quickly to save them. Next, kill four more zombies. And on the other side of the van, Carly will cover you.
As a result, the whole group will be able to leave the motel. Lilly will begin to find out who gave the medicine to the bandits. Having not received the last package that Lee found, they decided to attack. Choose 2 lines, and then 1. At this time, Kenny will hit a zombie and will have to stop the van, as he is stuck under it. Lilly will tell everyone to go outside.
Chapter 4: Quarrel on the Road
Lilly will vote to kick Ben out because she believes he is the one to blame. Choose line 3, then 1, and then 2. Lilly will kill Carly. Choose 2 lines so that Lilly continues the ride with everyone else instead of being left on the sidelines.
When the van starts moving, Katya will call you. Click talk to her. Katya will tell you that Dak was bitten. Select 1 replica. Talk to Clementine and choose line 3, and then 2 twice. Lee will dream that Clementine turned into a zombie and attacked him. Quickly press Q until he wakes up.
Chapter 4: Train Wreck
By morning, the van will arrive at the railroad crossing where the train crash occurred. So now you can't drive through. Lee and Ben will go on reconnaissance.
Walk forward to the train and talk to Ben. Go left and open the door to the carriage. Judging by the situation, someone lives there. Take the bottle of water from the box on the right. Look at the card that lies on the floor between the mattress and the open door opposite, and pick it up. It depicts the train route that goes to the coast to Savannah. That's exactly where Kenny wants to go. Exit through open door opposite and you will find yourself on the other side of the train. Go right to the junction of the carriages. Look at the train wheels on the right. The carriage went off the rails. Return to the others and give Katya the water. Talk to her and choose 1 line in the conversation. Talk to Kenny and show him the map. Kenny suggests going further by train. But first you need to start it.
Walk towards Ben and go up the yellow stairs to his right. Now go right along the bridge along the train until it stops. Note that you will pass by 4 doors that lead to the engine compartment. Examine the door to the driver's cab and see that a zombie is sitting there. Use the gun on the door. When Lee opens the door, click on the zombie to get closer. Research the engineer. He's dead, but he won't turn into a zombie. Ben will press the yellow button. She turns on the brakes, which are still working. At the sound of the brakes, Kenny will come and sit down to deal with the controls. You need to figure out how to start the train. Talk to Kenny. Look at the notepad on the left with reverse side control panels.
The sheet of instructions was torn off, but what was written there was imprinted on the next sheet. To read the notes you need a pencil.
Exit the cabin through the door on the left and you will find yourself on the other side of the train near broken car. Look at the car door. Examine the zombie sitting in it, the crackers near his feet, and the seat belt buckle. You cannot shoot him, as this may attract other walkers. So open the car door and unfasten your seat belt to free the zombie. When he climbs towards the exit, hit him with the door. Then take the crackers.
Return to the others and give Katya the crackers. Then talk to Clementine and choose 1 line. Talk to her again to ask about the pencil. Clementine will advise you to look for him in the van. Go to the van and go inside. Talk to Lilly. Look at the panel and take a pencil from the cup holder. When Lee turns around, he sees that Lilly has freed herself from the rope with which she was tied and wants to leave. Select replica 2 times. But Lilly pushes Lee out onto the street and steals the van. Select replica 3.
Go to Kenny's booth and use the pencil on the notepad. Now you can read the instructions and start the train. Complete step six first, then five and finally number nine.
Apply your hand to the panel on the right and set the switches number 6 as in the instructions (1 and 2 - down; 3, 4 and 5 - up; 6 - down; 7 - up). When you position them correctly, Kenny will tell you so.
After this, apply your hand again to the panel on the right and turn the knobs number 5 as in the instructions (1 – horizontally, and 2 – vertically).
Exit the cabin through the door on the right onto the bridge along the train. Next, open the first doors to the engine compartment (counting from left to right). On the left you will see a switch numbered 9. Turn it according to the instructions, first to the left and then to the right to start the train. Answer Kenny 2 with a line.
Now you need to unhook the cars that have gone off the rails. Open the engine compartment, on the doors of which the letters PV are painted. Take the adjustable wrench on the door on the right. Go into the carriage where someone lives and exit through the open door opposite to find yourself on the other side of the train again. Go right to the junction of the carriages. Inspect the hitch on the left and try to turn the handle, but it is broken. Examine the rod that connects the cars and use your hand on it, but nothing will work. Use the adjustable wrench on the rod to unhook the carriages. Then climb back into the carriage.
Chapter 5: Another Survivor
At this point you will meet a man named Charles who lives there. Select 1 replica twice. Talk to Clementine and Chuck. Then go forward to the train, near which Kenny is standing. Everything is ready to go. Select replica 3. When you and Kenny enter the cockpit, press the throttle (red lever).
On the way, select 1 line, and then 2. From Duck's mouth there will be blood. Pick up the rag from the floor and wipe it off. Katya will ask you to stop the train. Open the door on the right and go into the driver's cabin.
Chapter 6: Train Stop
Talk to Kenny and choose the following lines: 3, 1, 2. Talk to Kenny again and choose the following lines: 1, 2, 1, 3. Kenny will stop the train.
Chapter 6: Glade
Select 1 replica. To prevent Dak from turning into a zombie, Kenny and Katya decide to kill him. Suggest that Lee do this by choosing cue 3. Kenny and Katya will go into the forest to say goodbye to Duck. Answer Clementine with 1 response, and then 3. At this time, a scream will be heard from the forest. Lee will rush there and see that Katya has shot herself. Select 1 replica twice. Shoot Dak.
Chuck told Clementine that the same thing would happen to her as to Duck. When Lee finds out about this, he goes to talk to Chuck.
Chapter 7: Making Plans
In a conversation with Chuck, select line 2 twice, and then 1. He will advise Lee to draw up a plan for further actions, teach Clementine to use a weapon and cut her hair. Ask Chuck all your questions. Go into the cabin and talk to Kenny. Try to take cards from the basket next to him on the wall, but you must first distract Kenny.
Exit through the door on the right and talk to Ben. Select 1 replica. Go into the carriage and take the bottle of whiskey from the box on the right. Return to Chuck and give him the bottle. When he offers you a drink, refuse. Go into the cabin, talk to Kenny and offer him a drink. Kenny will go to Chuck, and you take the cards.
Exit through the door on the right and open the door to the carriage, but at this moment Ben will say that it was he who gave the supplies to the bandits. Select replica 3. Talk to Ben and choose line 2.
Go into the carriage and talk with Clementine about all topics except the first. Next, tell her that she should know how to defend herself. Select replica 3. When Lee places the bottle on the crate and Clementine takes aim and fires, pay attention to where it hits so you know how to adjust the shot next time. For example, if Clementine shoots to the right of the bottle, then tell her to shoot to the left and not move. If Clementine hits the right top corner, then tell her to shoot to the left and lower. You must help her break two bottles, and she will fall into the third herself.
Take the scissors from the backpack that lies next to the exit. Apply them to Clementine and choose to cut her hair. During the haircut, select 1 cue, and then 2.
Show Clementine a map of Savannah and select replica 2, and then 3. Lee and Clementine will make a plan of action: look for the boat and Clementine’s parents. Select 1 replica.
At this time, Kenny will abruptly stop the train, as the road is blocked by a tanker truck hanging from the bridge. A guy and a girl are standing on the bridge - Omid and Krista. Select 1 replica. Omid will invite Lee to inspect the accident site, so go up the stairs to the bridge. Select 1 replica three times. Inspect the coupling that holds the tank and use your hand on it. But here we need some tools. On the left, inspect the Emergency Ministry truck, open it and search it. You will find electrical tape.
Go down and select 1 replica. Go right and talk to Clementine and Christa. Go left and talk to Ben, who is standing on the roof of the train. Select replica 3. Go up to the driver's cabin and talk to Kenny and Omid.
Go outside and go right to railway station. Clementine will join you. When you approach the station, go all the way to the right. Try to open the door, but it is locked. Then look at the open window above the door and use your hand on Clementine to lift her to the window. When Clementine looks inside, ask what she sees there. Clementine will be able to open the door. Come inside.
Chapter 7: We are a team
When Lee and Clementine enter the room, it turns out that it is too dark. So prop the door open with an adjustable wrench. On the right, behind the bars between the shelves, there is a blowtorch. It could be used to cut off a tank. Try to open the door in the grille, but it is locked, and the keys are hanging on the opposite wall. Then examine the hole above the grate and place Clementine in it. Once she's inside, two zombies will approach you. Retreat to the front door by pressing W until you can pick up the adjustable wrench. Then hit the zombie on the right with it. Then quickly press Q until the arrows come together, and then press E. When Lee deals with them, it turns out that there is another zombie behind bars. We need to save Clementine. When she hands you the key, quickly take it, apply it to the lattice lock and open it. After that, quickly shoot the zombies.
Krista will enter the room. Select 2 replicas, and then 1. Take the blowtorch, select 1 replica and get out of here.
Returning to the bridge, talk to Christa and climb up the stairs. Then use a blowtorch on the coupling that keeps the tank from falling. But it turns out that the lamp hose is leaking. Apply the electrical tape that you found in the Emergency Ministry truck to him. Now everything is all right. Use the blowtorch on the clutch again. While working, the tank moves and almost hits Lee, but Omid saves him. Use the blowtorch on the clutch again, but now Lee can't reach it. Give the blowtorch to Omid. While he cuts the clutch, Lee will hold it.
Chapter 7: Crowd
While Omid is cutting off the tank with a blowtorch, Ben notices a crowd of zombies on the horizon heading this way. We need to leave quickly. The tank was finally cut off and fell away from the tracks. Kenny will start the train. Quickly push the blowtorch off the bridge and it will ignite the fuel that is pouring out of the tank. Lee and Omid will have to jump from a bridge onto the roof of a train. Select replica 3. Omid will jump unsuccessfully, fall to the ground and injure his leg. Krista will rush to his aid. When you need to choose who to help get into the carriage, move the cursor to the right and help Omid. Krista will jump into the car herself.
Chapter 8: By Express to the Atlantic
The train journey to the coast continues. Lee drives the train while Clementine sleeps in the next seat. Kenny will come by soon. Select 1 replica. At this time, you will hear that someone is trying to communicate on Clementine's radio, which seems to be broken. An unknown voice will say that Clementine's parents are with him in Savannah and she must definitely find him, despite Lee's opinion.
To be continued…
After watching the video for Episode 4 – Around Every Corner, you will see the game statistics:
1. Sweet, merciful death. Did you shoot a girl on the street?
2. Abandoned. Did you leave Lilly?
3. Confrontation. Did you fight Kenny?
4. Heavy burden. Did you shoot Duck?
5. Helping hand. Did you help Omid?
Trial
At first passing The Walking Dead: Season 2 Episode 3 In Harm's Way watch a video about the events of previous episodes. Next, we try to take a butterfly sitting on a tree, after which we talk with Sarah, and then with Carver. As a result, the bound Clementine will be put in a truck. During the trip, Kenny will ask you to find something sharp to cut the ropes, after a short argument with the others, in which you can choose to support Kenny or the others, he will find a way to free himself.
House, terrible house
After everyone is taken out of the truck, the doctor is immediately taken to the infirmary; we keep his daughter Sarah in conversation. In the fenced area for offenders, we will meet the one-armed Reggie, whom you can ask about two more people here, a guy named Mike and a girl whose name no one knows yet. Having finished talking, we inspect the area while Kenny distracts Reggie, in the process you can talk with people, and also look at the hose, fence, hole in the fence, bags of manure, fish statue, etc. If you tell Kenny that you didn't find anything useful, everyone will end up going to bed.
While viewing game walkthrough video The Walking Dead 2: Episode 3 – In Harm's Way to switch between videos, use the “Playlist” tab and if the video helped you, don’t forget to like))…
Calm and quiet
Having woken up, we approach the gate and listen to Carver, during his speech Sarah decides to talk to Clementine, which Carlos will not like, in the end he will force Carlos to hit his daughter. At the end of this scene, everyone will be sent away to work, Clementine will be sent to work in the armory, and before she leaves, bags of manure will fall from the winch installed on the roof :). In the armory, while loading magazines, we communicate with Bonnie until Tavia comes for Clementine. Before leaving, Bonnie will give Clementine a jacket. The new place of work will be a greenhouse.
Too far
In the greenhouse, after talking with Sarah, support her and tell her that Carver is the villain, after which Reggie will appear and will be put in charge of watching the girls. In the process of cutting branches, we will have a choice to do our job or help Sarah, whatever you choose, Carver, who comes a little later, will be unhappy and will punish Reggie by throwing him off the roof.
Breakthrough
Having told Bonnie about what Carver did to Reggie, then you tell the same thing to Kenny and Mike, and after walkers burst into the room, we hit one of them on the head with a board. Next, by pressing the A button, we dodge the walker, continuing to press A, we crawl along the wall, in the end, in order to push away the shelf blocking the path, press Q several times, and when the indicator is full, press E. In the next scene, you will need to select a sledgehammer or a ladder, pushing the ladder onto one of the walkers we run away from the second one by pressing the S button, and after Clementine falls, we choose to raise the screwdriver or free our leg from the cable, one way or another the walker will attack Clementine, so press Q until Troy intervenes. On the way back, Clementine will be grabbed by Luke; press Q to bite his hand. After talking with Luke, we promise to bring him the walkie-talkie the next day at the same time. Leaving the store, we tell Troy that we read comics, after which Clementine will go to Carver’s office.
Extension
When we come to Bill Carver's office and talk to him, we agree with him or condemn him. As a result, the conversation will be interrupted by Tavia, who reports that the gate is broken. Returning to the courtyard, we communicate with the others, informing them about Luke and his plan; in the end, you will need to choose one of two escape options or use both. At the end of the conversation, Jane will approach the group and tell you how to disguise themselves from walkers, as well as how to get into the warehouse, all you have to do is agree.
Breaking and entering
After Mike lifts Clementine, we grab the rope along which we get to the stairs. Grabbing the ladder, we climb up it to the roof. At the top you can see on the left: the greenhouse door, the exit door from the roof and the glass hatch above Carver's office and on the right the same glass hatch above the warehouse. Once in the warehouse, we go down the shelves and drawers, and when Tavia turns away or moves away, we run up to the walkie-talkies and take two of them, after which Clementine will return to her group, all that remains is to jump on Mike.
Born to run
In the morning, Tavia will take Rebecca, Nick, Sarah and Jane to work, remaining with Kenny and Mike in a conversation, we agree to take the radios to Luke. After which Troy will appear and take the others to work; on the way, Bonnie will take Clementine to him. While communicating with Bonnie, we tell her about walkie-talkies and Luke, and after she lets Clementine go, she goes to the comic book store.
Communication failure
Having run to the store, we inspect the premises in search of Luke until Troy catches you doing this, you can also immediately leave the store and then Troy will catch Clementine at the entrance.
An eye for an eye
After everyone is returned to the yard, Carver will make another speech and demand the stolen walkie-talkie, starting a countdown so that you don’t try to say that Kenny will take the blame, for which he will be beaten half to death by Bill. While Carver is beating Kenny, you can choose to try to restrain Sarita or try to help Kenny by receiving a butt from Troy. As a result, Bonnie will appear and report a breakthrough, and she will be left to guard the others. After talking with the others, we decide that we will continue to act according to plan and agree on a meeting place in Parker Run, if we suddenly have to split up when escaping.
Confusion
Finding herself on the roof again, Clementine will make her way into Carver’s office, after examining the unconscious Alvin, we approach the alarm system console. Having turned on the external speakers, turn the volume control and then inspect the CD receiver which does not contain a CD. Taking the CD lying on the bottom shelf of the table and inserting it into the receiver, Clementine turns on the speakers. After talking with the awakened Alvin, Clementine returns to the warehouse, if Alvin is not in the office, taking the pistol from the table and blocking the door, we go to the warehouse. At the warehouse, we jump onto Carver from the rack or shoot at him, after which we decide to stay and watch Kenny kill Carver or leave with the others.
Entropy
On the street, having hacked to death one walker with an ax, we rip open his belly and smear ourselves with his entrails, after which we help Sarah do the same. After Jane shoots Troy, we walk through the crowd of walkers until a bullet hits Carlos and the walkers attack him. Having tried to calm Sarah down, we begin to fight off the walkers, dodging in the direction indicated by the arrows on the screen. To pull out the ax stuck in the head of one of the walkers, press Q and then E several times. In the end, you will need to decide to hit the walker who bit Sarita or cut off her hand. On this walkthrough of the third episode of the second season games The Walking Dead will be finished.


