Monitor calibration in Windows 10 (and other versions of the operating system) is a very important point in work. Especially important monitor calibration for photo processing. The monitor calibration program is not needed. Windows has a built-in color calibration tool that can help. The built-in tool will display pictures for the monitor calibration.
Reasons to calibrate the monitor:
- Unsaturated colors
- All colors are gray
- Too light colors and so on
We do not advise you to calibrate the monitor online, since the built-in functionality completely copes with this task. But on the Internet you can find photos to calibrate the monitor, if the system appeared not enough.
The monitor software calibration does not make sense, since there is a special tool in Windows. Home monitor calibration is carried out by a regular tool that is on the path (for Windows 10):
- "Start"
- "Parameters"
- "System"
- "Screen"
- "Advanced Screen Settings"
- "Calibration of colors"
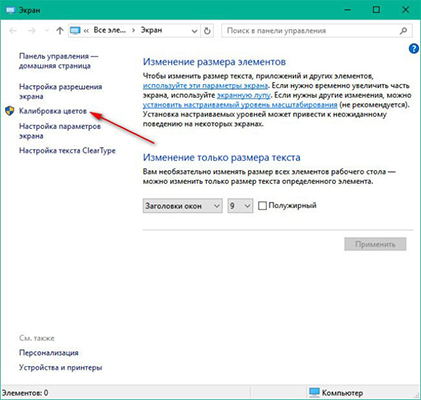
Monitor calibration test in Windows 7 starts different ways:
- "Control Panel"
- "Screen"
- "Calibration of colors"
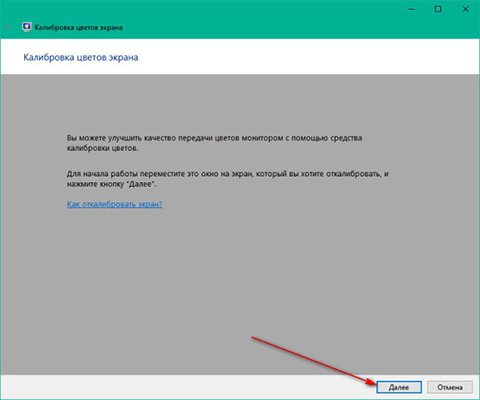
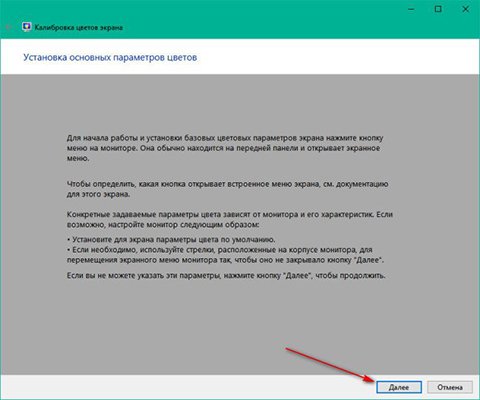
A monitor calibration configuration program will open, click "Next" to start calibration.
Calibration of colors in Windows 10 opens along the path: "Start" - "Parameters" - "System" - "Screen" - "Advanced Screen Settings" - "Calibration of Flowers". For Windows 7: "Control Panel" - "Screen" - "Calibration of Flowers".
After opening, it will be prompted to set the default monitor settings. We are talking about the settings that are displayed directly in the monitor itself, buttons.
On the next screen, we show an example of the correct gamma setting by clicking the "Next" button, you will move directly to the gamma setting.
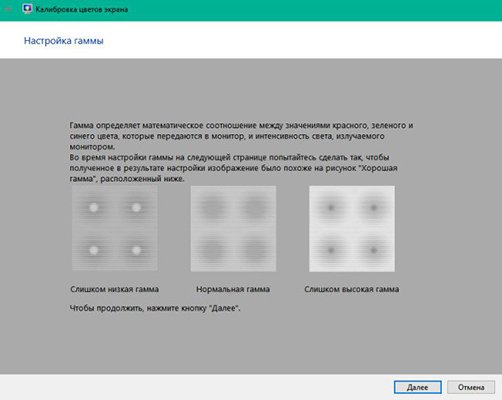
Scrolling the slider on the side, you need to achieve the effect when there will be neither light or dark spots inside the circles. Circles must be evenly gray.

Having achieved the desired result, click the Next button. The following screen offers to open brightness controls and contrast on the monitor itself and click "Next".
If the brightness and contrast of your monitor are satisfied, boldly click the "Skip Settings" button. If you want to adjust these settings, click "Next" and follow the instructions:
- In configuration setting, it is necessary that, with the maximum allowable settings, folds and buttons on a shirt on the proposed image system were clearly visible.
- In the brightness setting, it is necessary to calibrate the brightness so that the colors on the proposed image are not merged and not too light
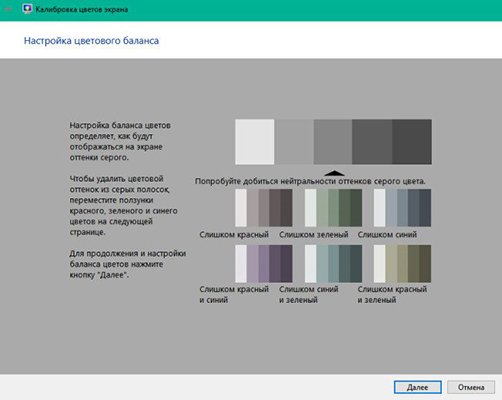
The following screen shows incorrect color setting.
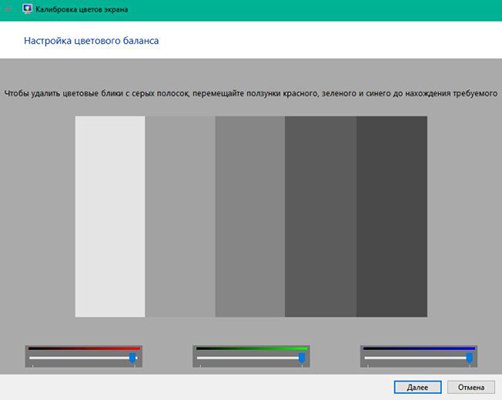
Click "Next" and check the display of gray strips on your monitor. If they do not have gray shades, but colored, screw the lower sliders to achieve the most good result (all strips must have gray tones).
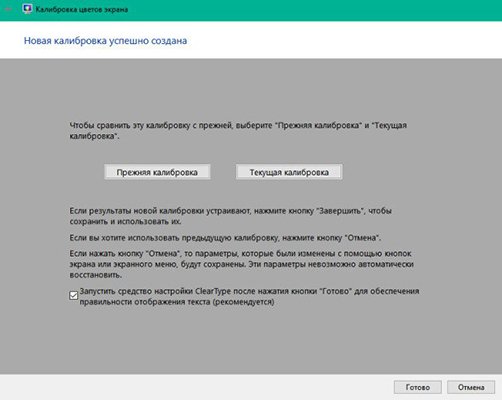
If before clicking on the "Finish" button, do not remove the checkbox from the "Run a ClearType setting tool tool ...", then you will go to the Font Display Settings window.
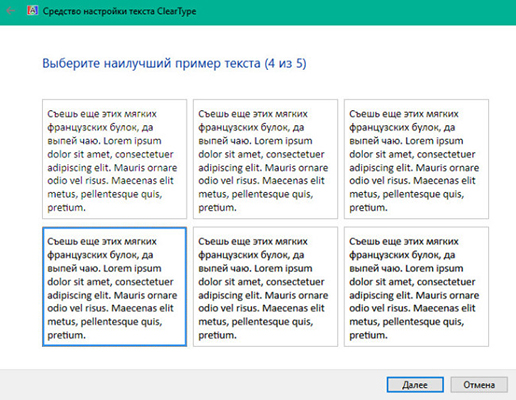
You need to choose from the presented options one that, in your opinion, displays fonts with the best draw. Example:
After passing all the tests, the monitor color calibration will be completed.
Have questions? Specify in the comments.
In the calibration tool there is a setting that allows you to adjust the contrast. Configuring the monitor contrast determines the level and brightness of light tones. Configuring monitor contrast:
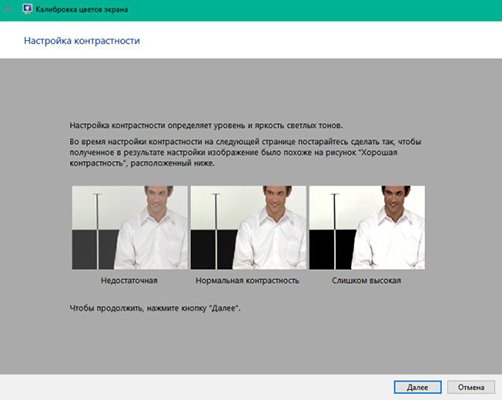
The monitor contrast setting will end when you click "Next".